
I bring you a very visual express class of pumpkin decoration, which on the occasion of Halloween is in the crest of the wave. I also teach you three different techniques to decorate pumpkins or any decorative object that you can think of: maxi terrazzo, splashes and make a sack with velvety fabric. Through the elaboration of my decorated pumpkins you will learn and it can serve as inspiration for a lot of home projects.
I have never been a fan of Halloween decoration and I never imagined that I would be interested in it. But I am a big fan of adapting the home decor to the season we are in, and if I think of autumn, three things occur to me: dry leaves, ocher colors and pumpkins.
Also pumpkins are very easy to find in the supermarket at this time of year, and we wanted to make healthy recipes with them, so the last time I went, I came back with three under my arm.
I had wanted to try several techniques in my projects for a while, and I could not find the occasion, so I decided that pumpkins were a good opportunity. One of them, the largest one, I would use as a vase or pot for one of my little plants. The other two, I would simply decorate them with different methods. Let’s see the processes one at a time:
MAXI TERRAZZO PUMPKIN POT
The first thing I did to make my pumpkin vase or flowerpot was to empty and clean the pumpkin, keeping everything I got from the inside for a rich puree that Charlie would prepare, the chef of the house.
The emptying process is not complicated but you have to take some advice into account to use it as decoration.
I leave the process visually, step by step and then we will comment:
Video © Home archiLAB
In summary, the most important tips I can give to empty a pumpkin are:
- Mark the upper opening with a diameter that allows us to put the hand
- Cut mentioned lid following the marked diameter and nailing the knife diagonally.
- Lift the lid up. This diagonal cut is essential if we want to replace the lid after emptying. If the cut is vertical, when the pumpkin is empty, the lid will be pushed inwards. With the edges diagonally we allow the support.
- We open the hole a little more with a knife so we can put our hand or a utensil more comfortably.
- To start the emptying, you can introduce the clean hand and start to remove the pulp and pips or use a kitchen utensil type ladle.
- Separate in two containers the pips or seeds of the pulp and the flesh of the pumpkin. This will facilitate the cooking process afterwards. The pips can be toasted and are a delicious snack.
- The hardest part comes next because it consists of removing the hardest part of the flesh of the pumpkin scratching the walls. For this I recommend using an ice-cream scooper or a similar utensil that is very strong. Scratch all the walls well to make the most of the pumpkin.
- If you are going to use the lid later, remember to cut the whole pulp because this part is the one that has more water and rots first.
From here you can use your pumpkin as you want, either as a vase or as a typical Halloween decorated pumpkin in which you can carve holes and put a candle inside as we are used to seeing in this time.
I’m going to show you what I did with it. I would use it as a flowerpot for a plant but not without first decorating it with the Maxi Terrazzo method that is so fashionable.
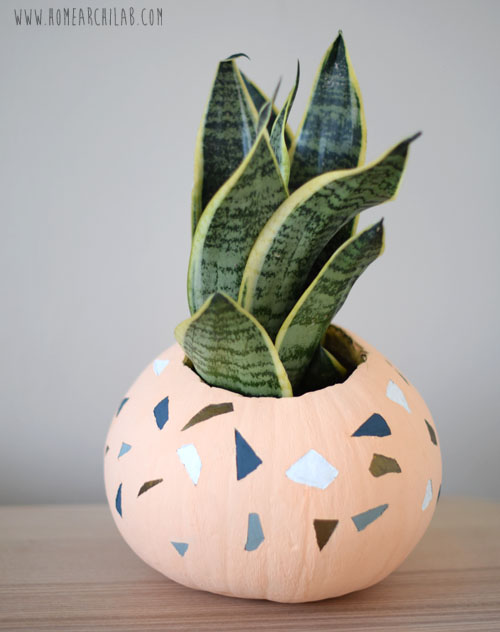
Photo © Home archiLAB
To make the Maxi Terrazzo I used the technique that I show you next step by step:
Video © Home archiLAB
The process to realize the Maxi Terrazzo consists of:
- Cut pieces of washi tape or painter’s tape into pieces of irregular geometric shapes imitating the terrazzo specs
- Glue these pieces of tape across the surface
- Paint the entire surface of the main color you want the object to have. Give several passes to take a certain thickness and cover well. Important to let dry between each hand
- Once dry, lift the tips of the pieces of tape stuck with the help of a punch, a crochet hook or any pointed object.
- With a pair of tweezers, carefully remove all the pieces of tape. You can help yourself with the aid of a cuter to review the shape of it and thus not take more paint than necessary when stretching.
- Paint the gaps that been left with varied colors. For this use a brush with a fine but firm tip. Give several passes to each color.
Now all that is needed is to put a plant inside or a container on which to arrange some flowers.
VELVET PUMPKIN
Velvet Pumpkin are the queens of Pinterest.
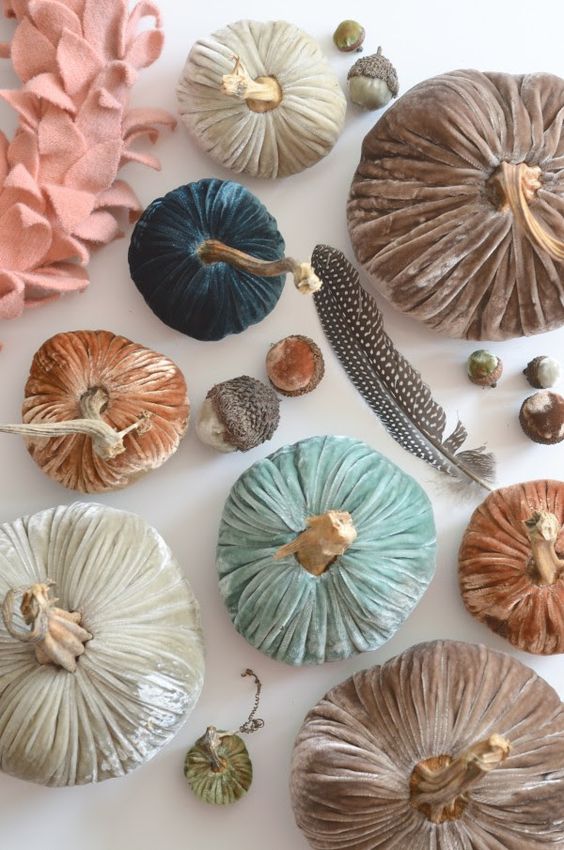
Photo Pinterest
As soon as I saw them I fell in love with them and I felt an overwhelming desire to make one with the excess fabric of my Upholstered headboard. 
Photo © Home archiLAB
I leave you with the step by step and then I tell you the most important things to remember:
Video © Home archiLAB
Process to make a Velvet Pumpkin:
- Cut a square piece of cloth that completely covers the pumpkin. If you double over it the opposite edges should be touching. To do this, place the pumpkin on the fabric, mark the measurement in both directions and draw a square with these measurements.
- Now draw the circumscribed circle in this square. If you do not have a hand to do it, you can get help with a piece of string.
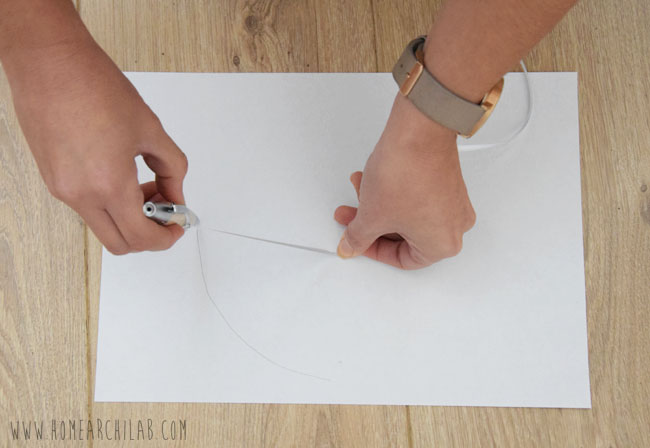
Photo © Home archiLAB
Tie the thread to the pencil and fix one end in the center of the square. The length of the thread should be to the center of one of the sides. So, holding the thread in the center, stretch the thread and make a turn drawing with the pencil. If it is not easy to do on fabric, you can do it on a newspaper for example and then put it as a template to cut the fabric.
- Make a pleat with a needle and thread along the perimeter of the circle. To do so, you only have to insert and remove the needle in intervals of approximately 1 cm.
- Before closing the circle put the pumpkin inside. I did it with a real pumpkin but the good thing about the Velvet pumpkin is that you can fill the cloth with rice at this time and pump it into a pumpkin shape with your hands.
- Finish off the circle, cut the thread and arrange the fabric to give it a more pumpkin appearance.
- Turn it over and stretching from the center point, locate the center of the fabric.
- Around it, make another pleat, in a concentric circle.
- Gather the fabric, finish the second circle and cut the thread.
- In a piece of cloth, make a hole in the center to pass the stem that is in your pumpkin, if it has it.
- Put it in the upper hole to cover what looks like pumpkin and fit the stem that comes out in the hole.
- Get a piece of branch or tree root to make the tail. Wash and scratch the bark with a cuter.
- If your pumpkin has a piece of stem, make a hole with a drill in the base to the branch to fit the stem inside. If your pumpkin has no stem you can simply stick the branch on the top of the pumpkin through the hole made in the fabric.
SPARKLED PUMPKIN
The last of the techniques I want to teach you is the easiest of all and has a very attractive result. It’s about painting with paint splashes.
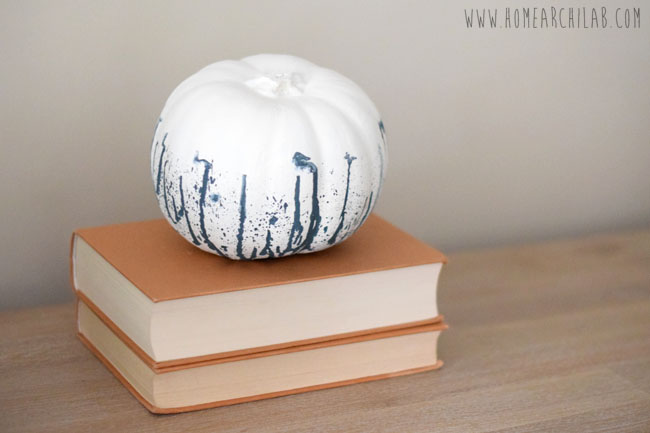
Photo © Home archiLAB
Let’s see the step by step:
Video © Home archiLAB
- Paint the pumpkin of the main base color, in my case it was white. To try another method this time I did it with spray paint. For this I put the pumpkin in a cardboard box to avoid messing too much with the spray.
- Paint on one side, let dry and paint on the opposite side.
- Dilute with a little water the paint with which we want to splash the pumpkin. The amount depends on the effect we want to achieve. If you want the drops to slide more you will have to be quite watery. If you just want to stain you can do it without diluting. Practice first on a paper.
- Protect with painter’s tape the part you do not want to splash.
- Put the pumpkin face down and splash paint with the brush until you get the effect you like.
I just have to show you how they are together.
Great to make a centerpiece if you have guests.

Photo © Home archiLAB
Or to decorate an autumnal corner of your house.

Photo © Home archiLAB
What do you think of my pumpkins?
Do you dare to customize yours?


