
I do not have children (for the time being) but possibly will have some mini-guests this summer (my nephews) who will come to do a language immersion in Dublin. So I decided to prepare a very special kids decoration in the guest room: a toy swing rack, with a simple and cheap DIY.
. 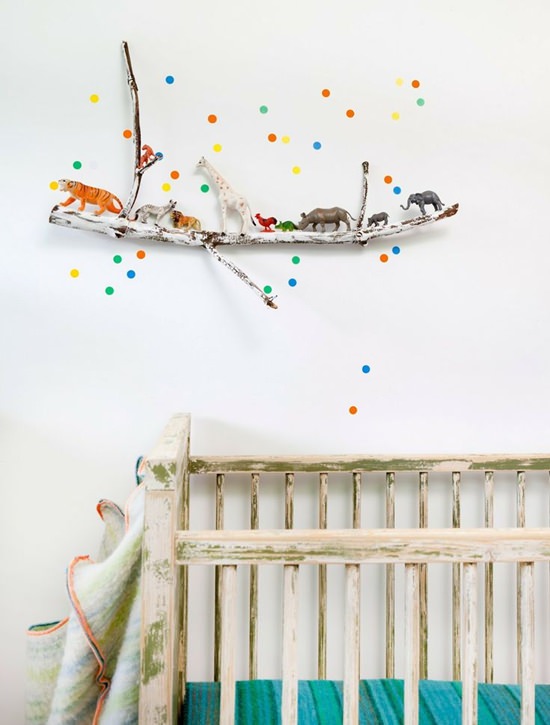
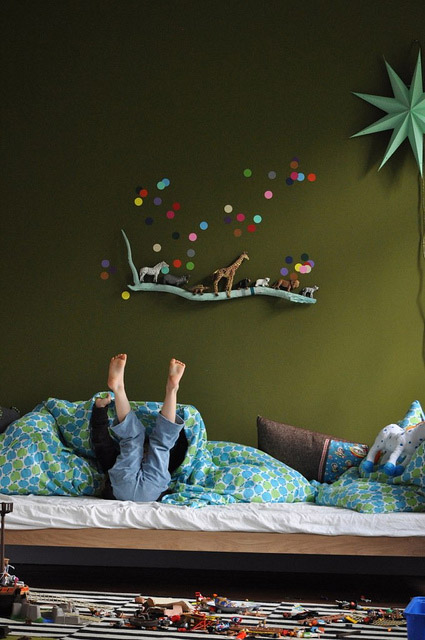
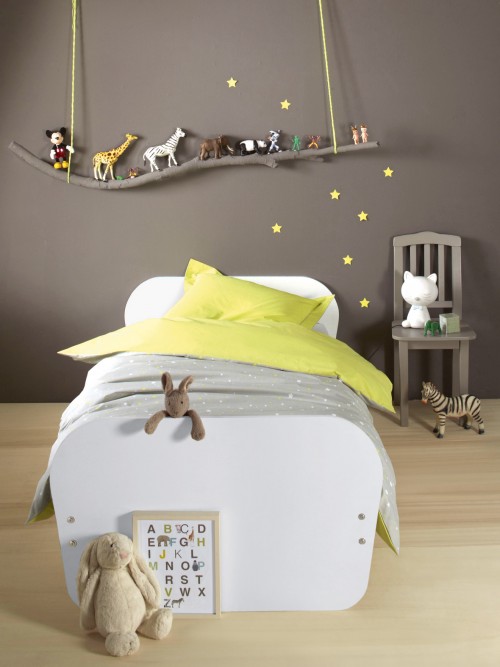
My inspiration came from these images, although my idea was to make a hanging swing, because attaching the branch to the wall directly is probably not be easy.
In my case, the decoration consists of hanging a branch from the ceiling as a swing and stick colored circles around it, so that the swing acts as a shelf for stuffed animals and dolls.
A few days ago, I launched a mini-survey through Facebook to see people’s preferred choice of this children’s room decoration.
The question in this case was whether or not to paint the branch and what color. To get a better idea I colored the different options with Photoshop on a photo.
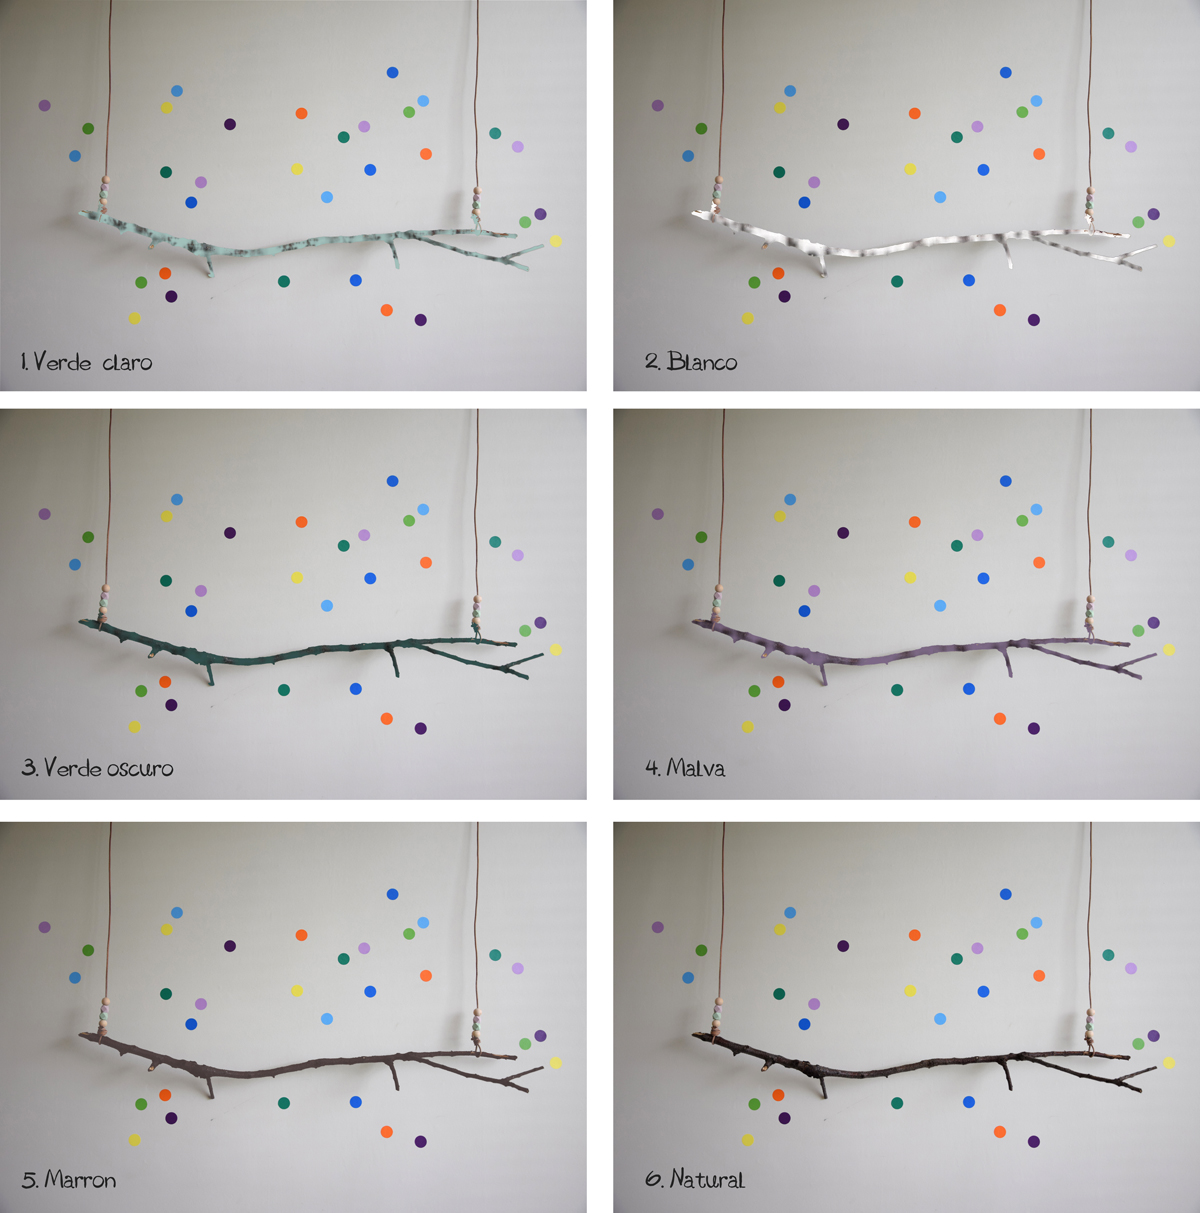
This is the image that you saw on Facebook, if you are my follower on the page.
If you are still not a follower, I don’t know what you’re waiting for: see Home archiLAB on Facebook!
Finally according to the vote, there was a triple tie between: White, Light Green and Natural.
I finally decided on Natural and this is the result that I show you below, alongside the process if you also want to do it yourself.
PROCESS
Your first mission is to find the branch, of course. You should look at the length that is appropriate for your space, unless it is longer, in which case you will need to cut it.
Also note that it is just thick enough for it to have sufficient strength and finally, if it has some minor twigs or is not completely straight, it will be more interesting.
1- After this, the first thing you should do is make sure you do not bring inhabitants inside.
In the branches there are usually small bugs that can be inside and you do not see them.
To kill them before you have a plague at home, I leave you some advice from Bayer advanced:
Freeze. If you have a chest freezer, put the branch in a bag and freeze it for a day or two. Insects will freeze and fall from the materials.
Seal and spray. Place the branch in a box or bag of waste, spray it with insecticide and keep it sealed all night. Insects will emerge from the wood, and you just have to catch them, sniff them or squash them. Only do this inside a closed bag or box.
Bake. If you are lucky enough to have a wood oven or a big enough oven this is your option: Bake the branch at minimum temperature for one hour. Control every 15 minutes to avoid burning. Do not bake if you have sprayed with any type of insecticide.
Boil. This could also be an option but for small branches, or pineapples, not for this case.
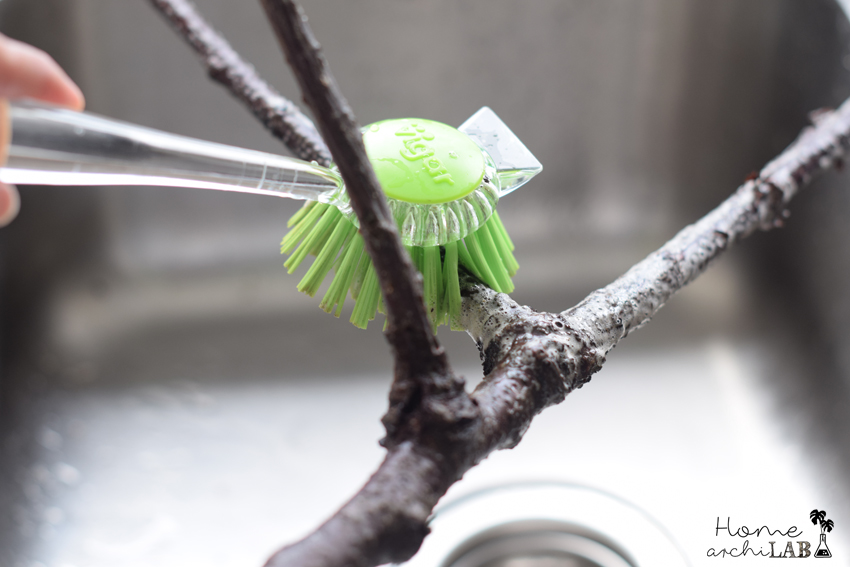
2- Once we have chased away potential tenants, wash the branch well with soap and water and a brush. After this you must leave a few days to dry completely.
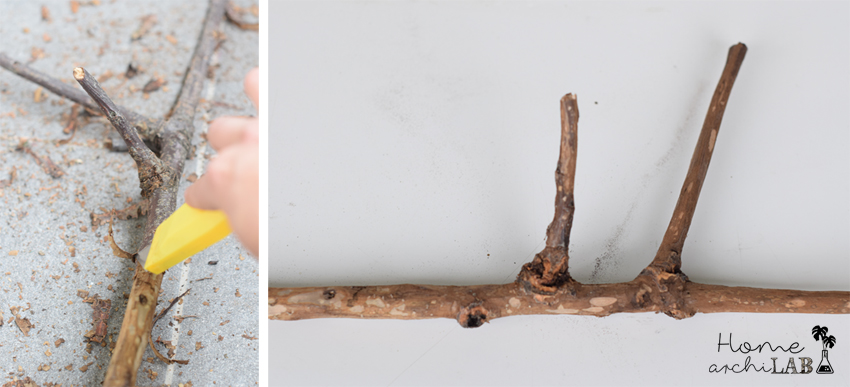
3- Remove bark by scraping with a cuter or knife.
The branch will be completely smooth and painting on it will be easier.
In addition, the bark, when dry, tends to peel and fall.
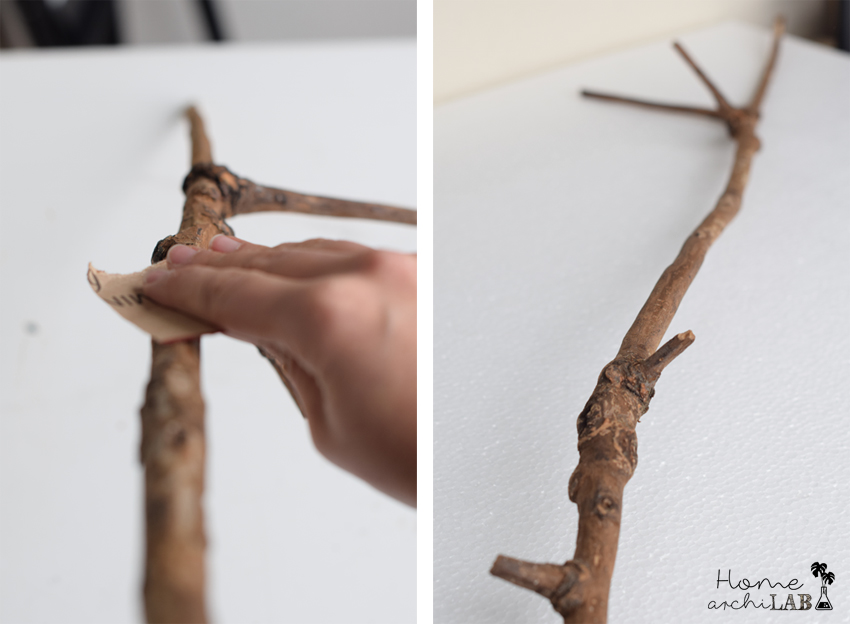
4- Sand the branch with thick sandpaper.
It should not be a perfect and thorough sanding, just enough to prepare the surface to paint.
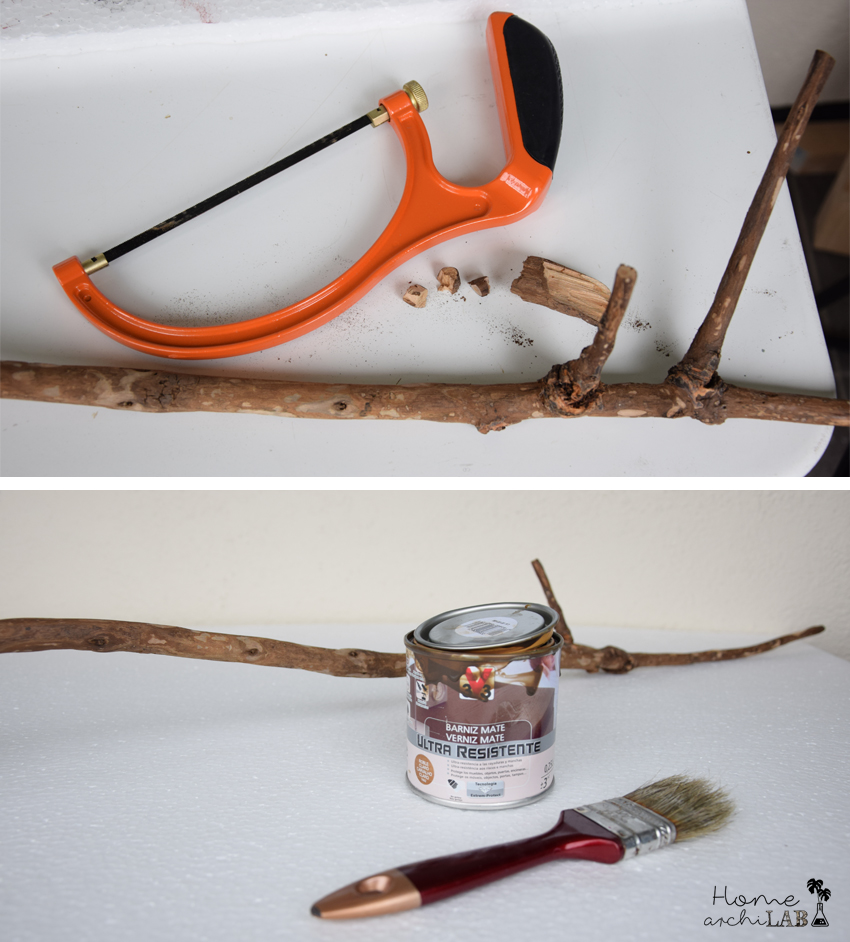
5- Cut out the imperfections, shorten the branch what you need, and cut off the branches if they are too long.
This step you can do at the beginning as well, which will save you sanding the twigs you do not need. After this you will be ready to paint.
6- Paint with varnish of the tone of your choice.
In my case I chose a matt light oak varnish.
Leave to dry at least 24 hours.
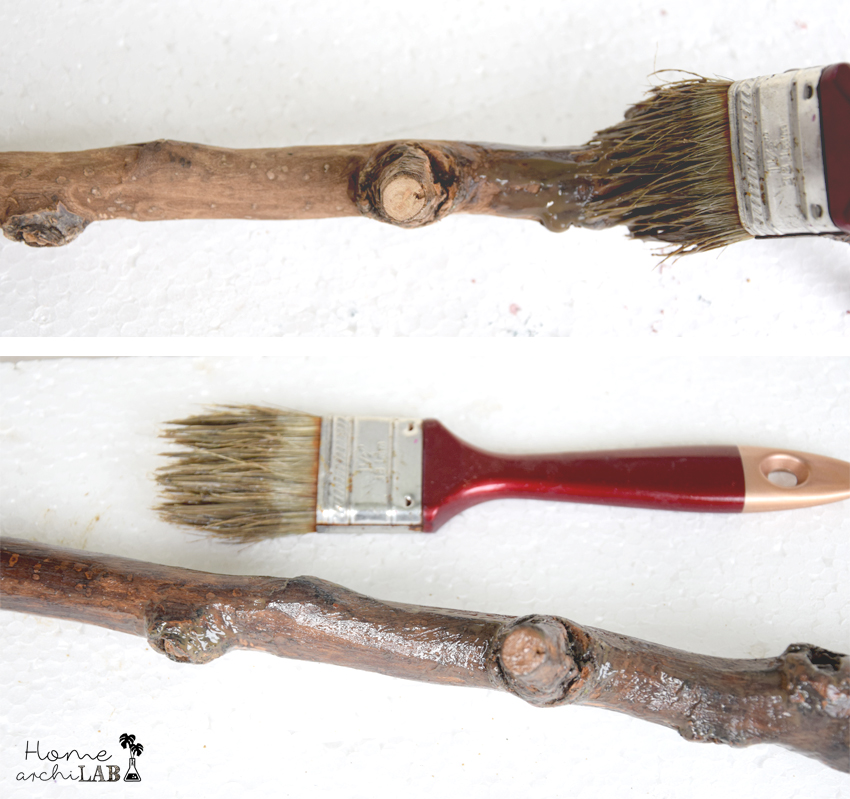
The branch is ready, and now it is necessary to prepare the suspenders or hangers.
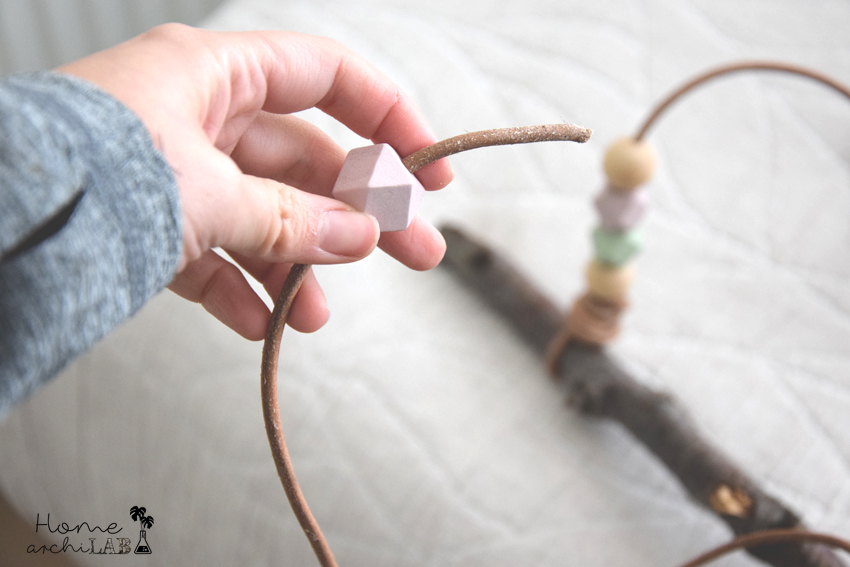
I used a cord of buffalo leather that I found at SØstrene Grene, one of my favorite stores of decoration and materials. And also, wooden balls of colors with different geometry found in the same place.
Obviously you can use rope, jute, fat wool or whatever you can think of. (Below I give you an alternative with wool).
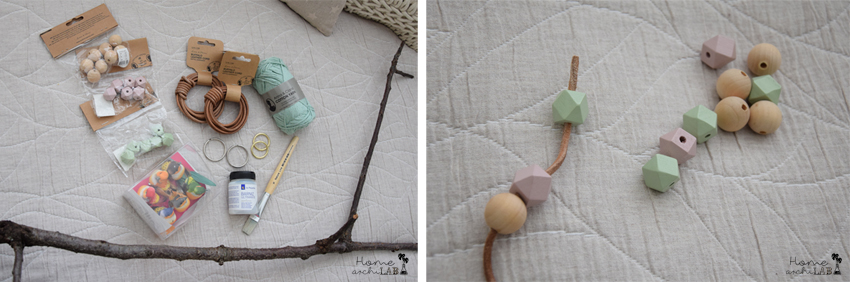
Measure the height at which you want your shelf, from the ceiling, and cut the cord leaving about 10-15 cm more. (I just tied a knot in the bottom to fix the branch, and screwed it up to the ceiling, but if you want to make the same knot on both ends apply the same on another side of the cord).
Put the balls you want to have in the bottom of the strap and put them under the 10-15 cm that you had extra.
With this surplus we are going to make the knot that will hold the branch.
It is a knot that allows you to open and close it and is also suitable for loose cords such as this skin-cord type, or for any other thick rope. Below the instructions to do it:
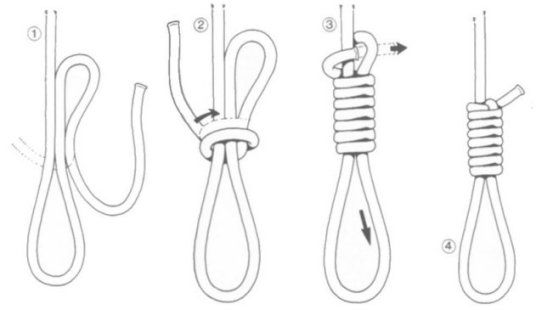
And some photos of how I did it:
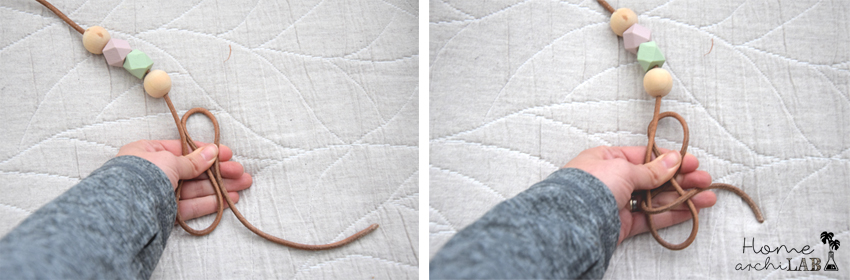
Once done you will see that by pulling it down you can adjust it on the branch.
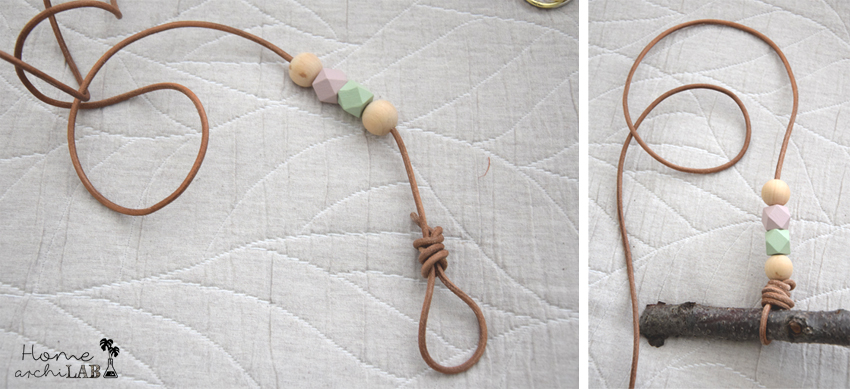
This is the time to repeat the operation at the other end of the same cord if you want the same knot. And repeat it in the other cord.
In my case I only tied the knot at the bottom so I just had to repeat the same operation on the other strap and that’s it! (The previous photo is misleading because I did not do it, I just took the photo to show you how it could be done).
In case you prefer to use wool of some color that contrasts with the wall, for example as in the previous photo, you can use a simple fat wool, as in the photo or if it is finer, here’s a suggestion for the strap:
Cut a very long piece of wool, enough to fold it six times on itself (each length is of the length that you need from the ceiling to the final position of the branch.
To do this by yourself you can make use of a door handle, like I did. With the same uncut ball, I hooked the wool on the door handle six times so that I had three double strings of the desired length.
Put a ball at each end and then tie a knot under the three, joining the three cords and leaving about 15 cm.
In this leftover piece, you tie the same knot that was explained above and was ready for the branch.
At the other end, make a knot about 10 cm and put another ball that rests on that knot.
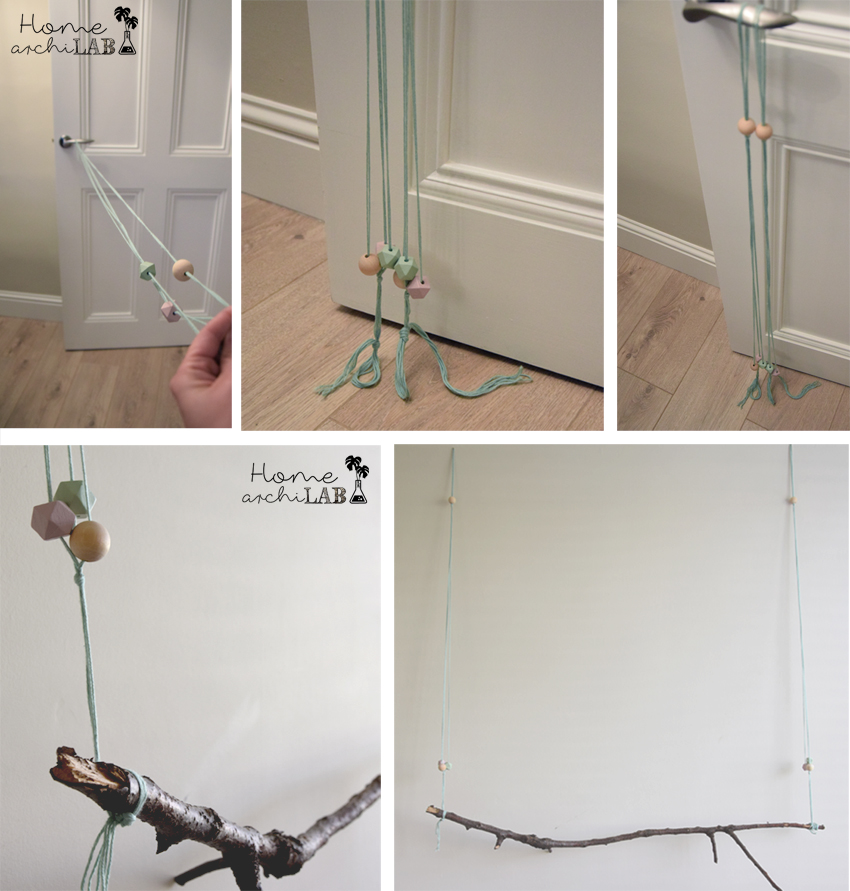
It is easier to do than to explain, I hope the photos clarify and if you have doubts you can ask me leaving a comment below.
Returning to my house, only the suspenders of the ceiling remain. Make a hole in the ceiling, put a cue stick and put a locket. Note that the hole should not be near the wall but leaving a gap of about 5-7 cm.
When you have the branch in place and not before, place the stickers.
These colorful circle stickers are sold on many online sites, even on Amazon. Look for the ones that best suit your decoration in size, shapes and colors because there is a lot of variety.
In case you like mine, I leave the link where I bought them: Deco&kids. They cost 15,5 € + 5 € shipping but come with 80 circles, so I bought it with a friend and we each kept half. So with € 10 total, it was enough.
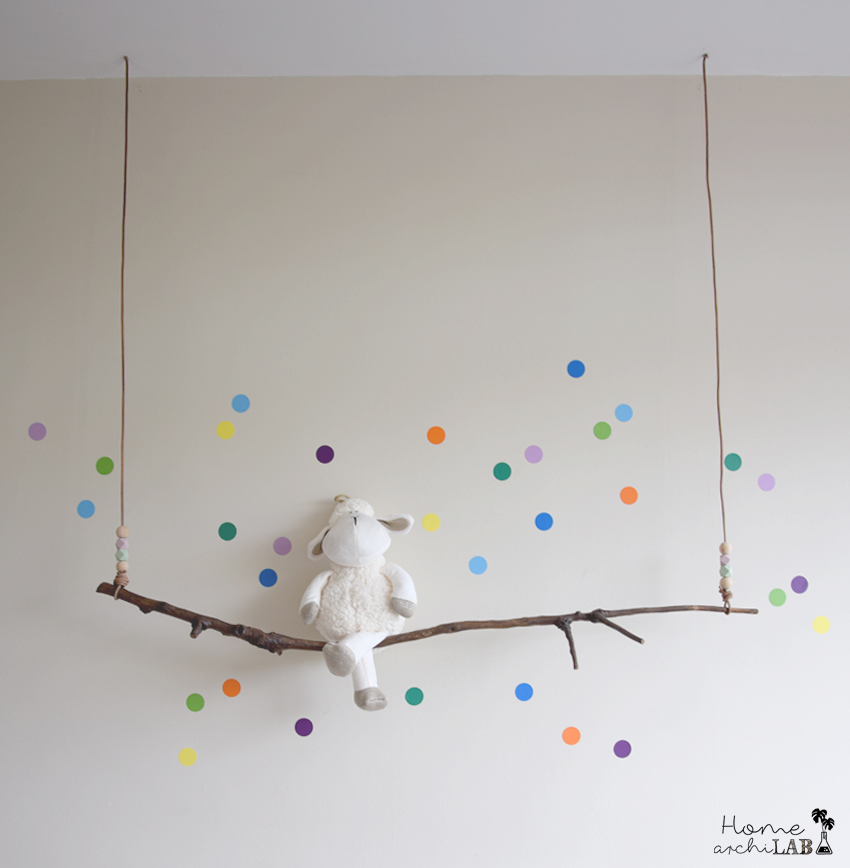
That’s how the whole set is, hanging from the ceiling.
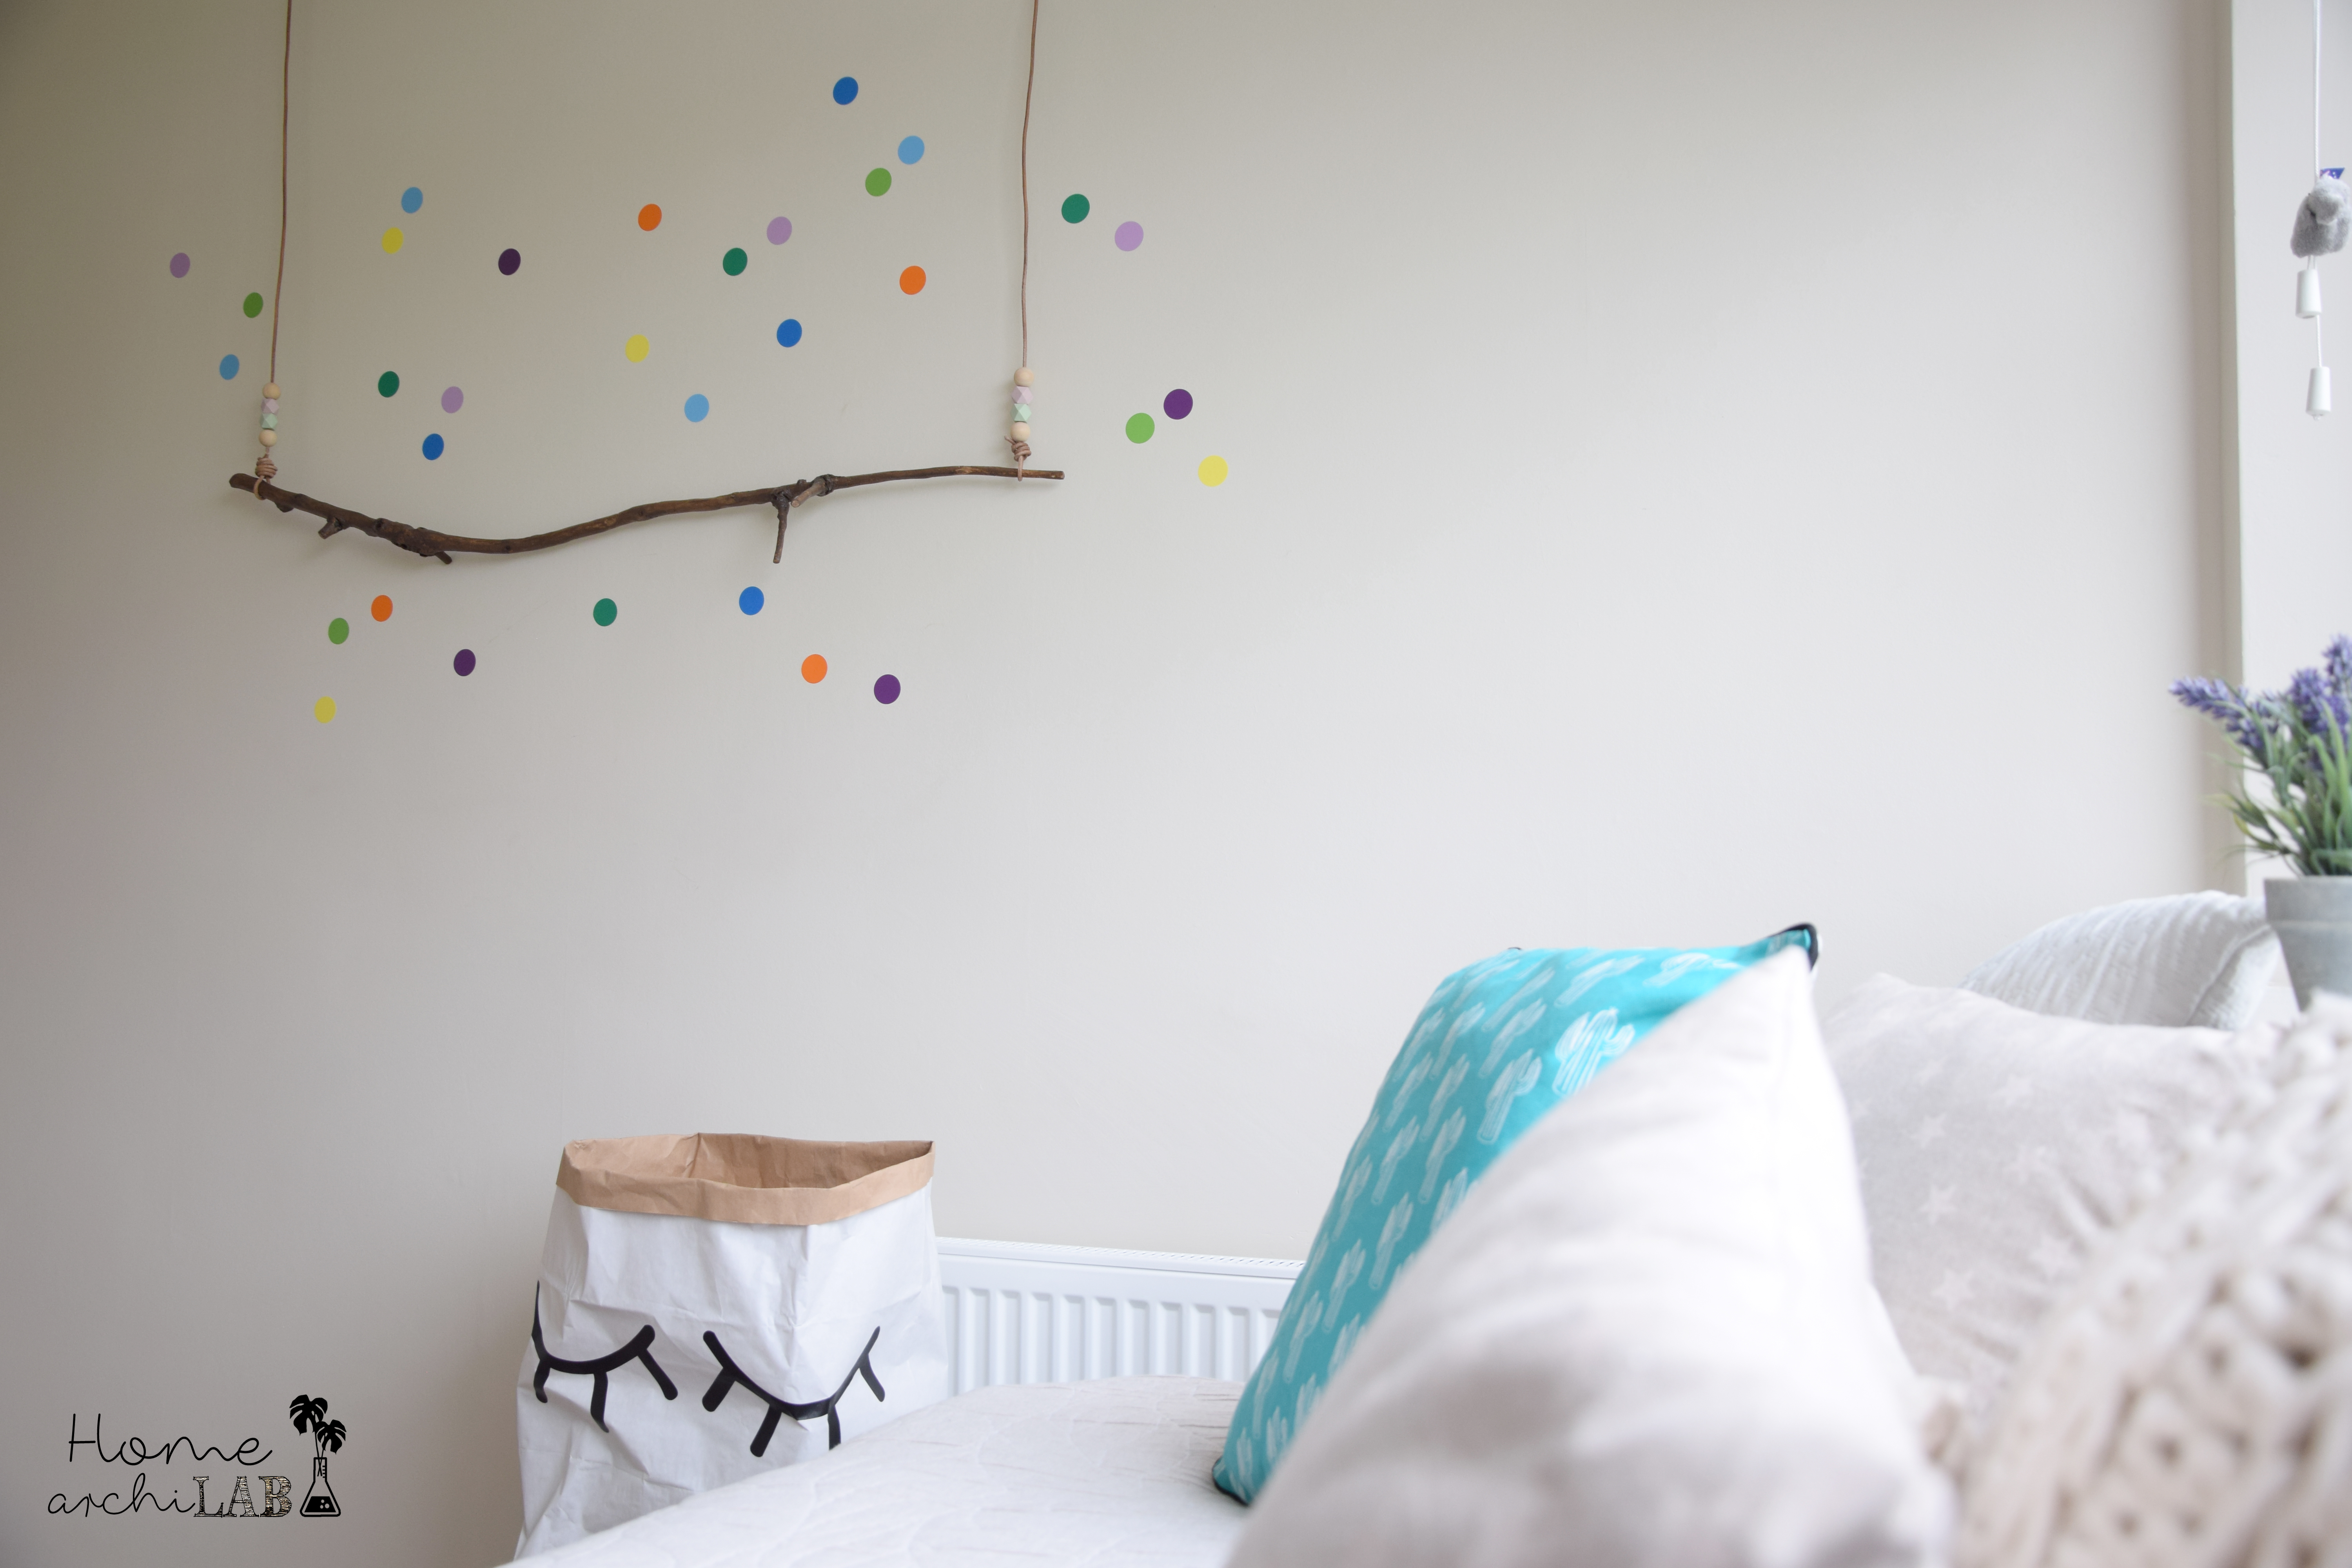 The colors of the stickers just come into the room’s range, which is decorated in turquoise, purple and yellow combined with white and beige, as you can also see in the post of the shelf makeover that is on the opposite wall. You can see it aquí.
The pack also came with red circles that I did not use, because I did not like how it configured with the rest.
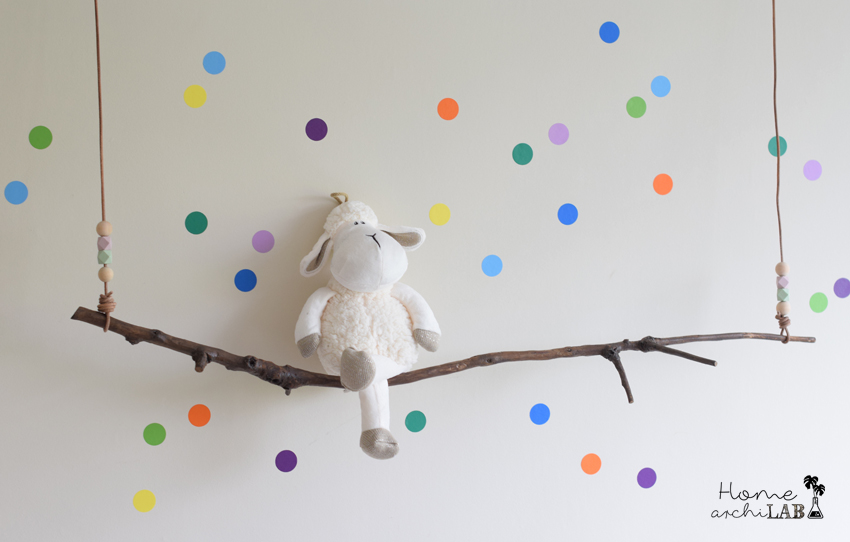
The branch is the swing of my Irish sheep, still unnamed. Do you propose any names?
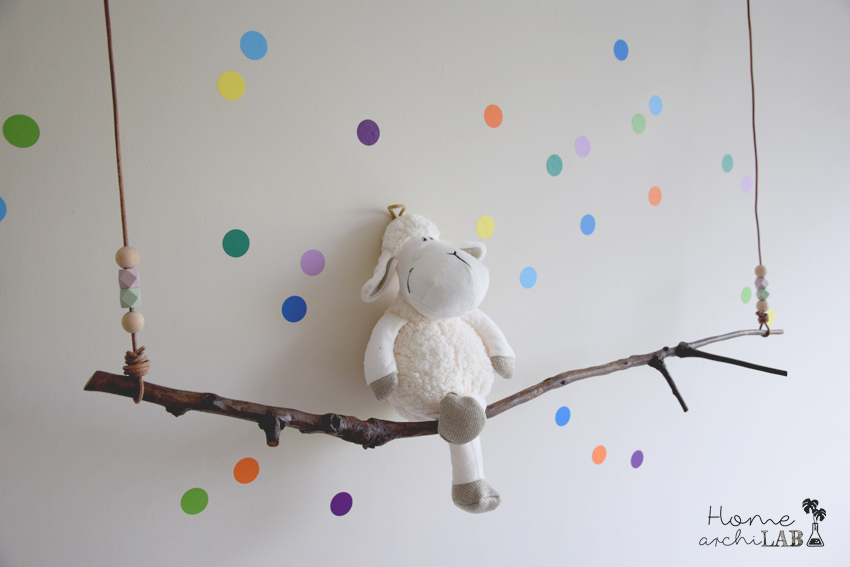
As you see the branch is separated from the wall, not touching it. The separation is about 5-7 cm.
If your idea is to put plastic animals as in the first photos, you should hang it closer to the wall so that the animals can stand. You should still glue them to the branch, especially if you have the branch on the bed or cradle.
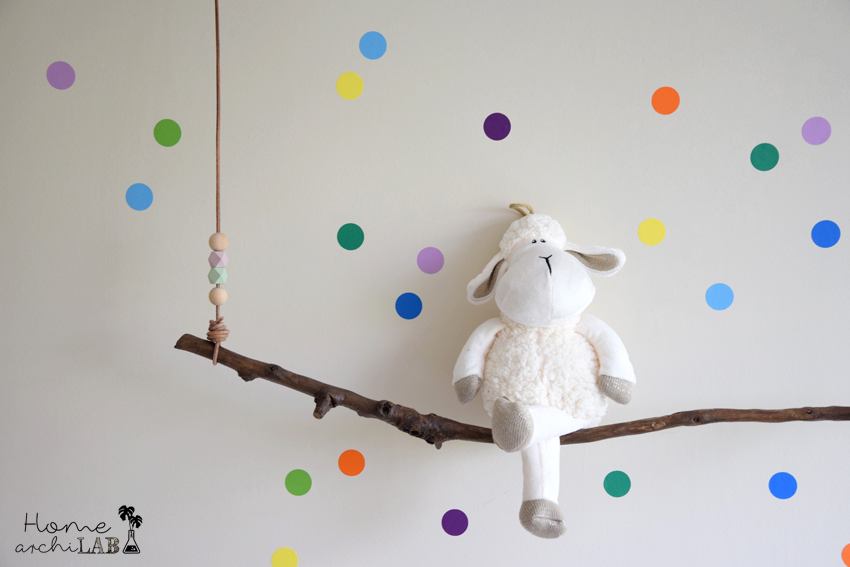
The natural option is clearly the best in this set as it is on a clear wall, I have beige and earth tones in the bedroom decor and it is already surrounded by multiple colors. Even giving it a worn effect with some color, without covering it at all, could not look bad.
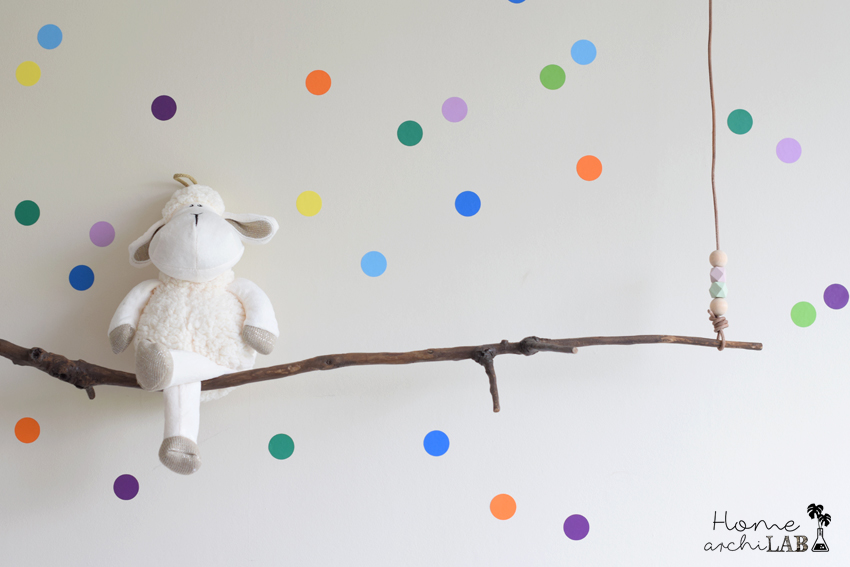
What do you think of the result?
It’s a DIY that is soooo simple and very very cheap, and do not tell me that the end-result isn’t great and and original!
My friend, with whom I shared the stickers, is in the process of doing something similar for her baby. I’ll show you when I finish it so that you see it applied in another environment and colorful.
If you liked, you can leave a comment and above all share it with your friends.
Thanks!


