
I return to the DIY decoration of my bedroom, which is getting a bit eternal, but which will be very worthwhile. In reality, this is one of the first DIY I did but I have not wanted to teach you so far because it reveals a lot of the final result. This is the personalization of Ikea’s Malm dresser and the nightstands of this series, with wallpaper and fabric including the before and after.
Before continuing, if you have not seen the previous progresses of the bedroom, you should take a look at the DIY headboard, the hanging lamps, the floor mirror and the coat rack.
Above all, the headboard is quite relevant to better understand the combination.
The furniture that we brought from Madrid included a completely white bedroom that to me seemed more common than a comic book (as they say in Spain).
Surely because the Ikea Malm series is a classic, repeated over and over and that everything white white is very bland, (especially if the furniture itself is not very good quality) I ended up tired of it and wanted a change.
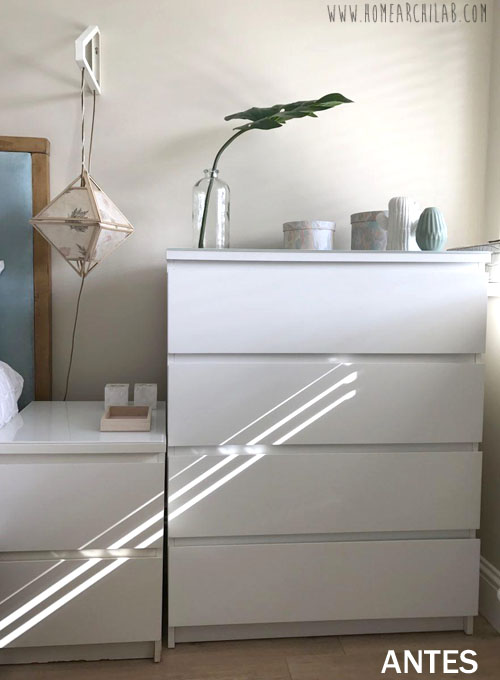
Photo: ©Home archiLAB
But we had just bought some furniture for the living room and seen the sum in the super spreadsheet of Charli, where he monitors every last cent of the family economy, it was clear that we could not increase that item for the time being.
In addition, in our nomadic life around the world, at the moment they did their function, so it was only an aesthetic question.
Obviously my creative mind, which loves the challenges of «having something ugly and of low budget», went on thinking. I decided to have a makeover by wrapping the fronts of the drawers and adding leather handles.
As you can see in the following picture I used two wallpapers (the first two drawers) and two fabrics: the headboard one and a leather one.
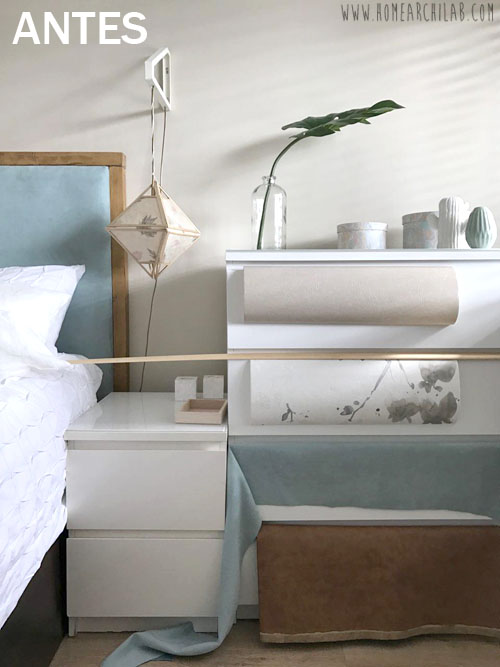
Photo: ©Home archiLAB
Lining the drawer fronts with wallpaper is very simple.
Being a smooth front you can mark the dimensions of the drawer by placing it face down on the paper and cut it to the exact size.
Before sticking it, I made the hole for the handle with a drill.
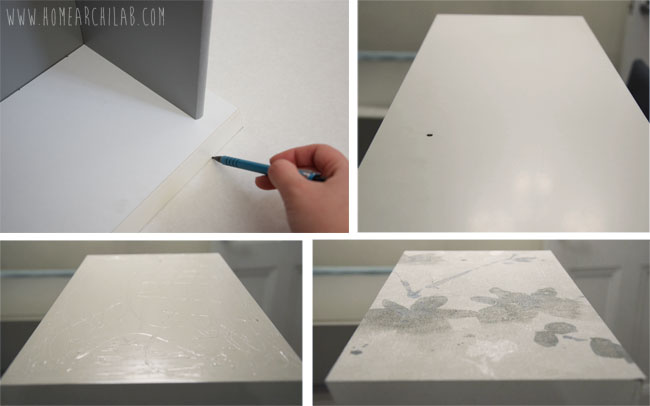
Photo: ©Home archiLAB
I cut the leather into bands to make the handles and I made a hole in each end to pass them through the screw.
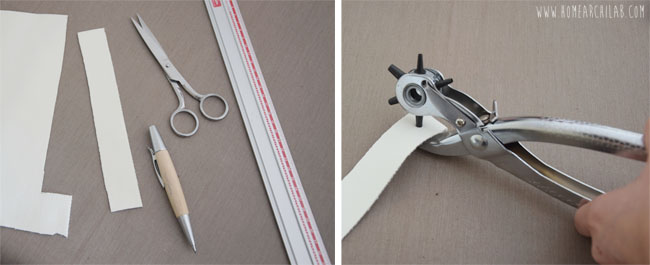
Photo: ©Home archiLAB
I used a perforator that cost me less than € 10 in Sostrene Grene,
but the truth is that you can do without it and do it with a simple drill.
I needed a few nuts and screws that fit in them and that had the exact length, noting that you have to add the thickness of the drawer and the nut, about 30 mm.
The screws I used were M4x30 mm and the nuts M4.
The screw is inserted from inside the drawer, the two ends of the leather strip are passed through it and closed by screwing the nut.
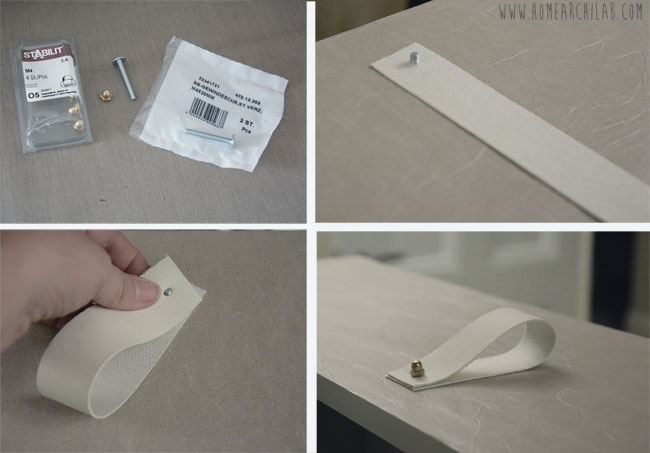
Photo: ©Home archiLAB
For the leather I used the same technique as with the paper, stick it on the front of the drawer to the exact size.
However with the velvety fabric what I did was to upholster the front, with the upholstery stapler that I bought to make the headboard.
As I explained in that post, upholstery is very easy. You just have to center the fabric and put staples on the inside with special attention to the four corners where you have to fold it well so that the edge is clean.
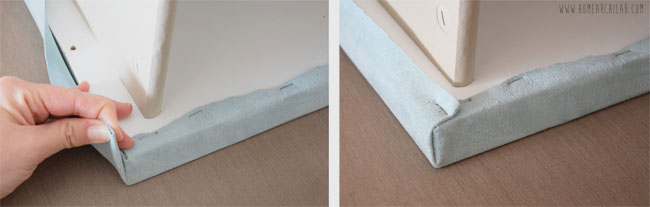
Photo: ©Home archiLAB
You can finish the edge of the interior upholstery where you can see the staples with a piece of tape, about 2 cm of any color that goes, stuck on top. You can find it in the same place where you buy the fabric.
Placing the handle in this drawer is like the rest, with the exception that you have to make a hole in the fabric to get the screw. I advise you to do it when it is already upholstered to know the exact location of the hole.
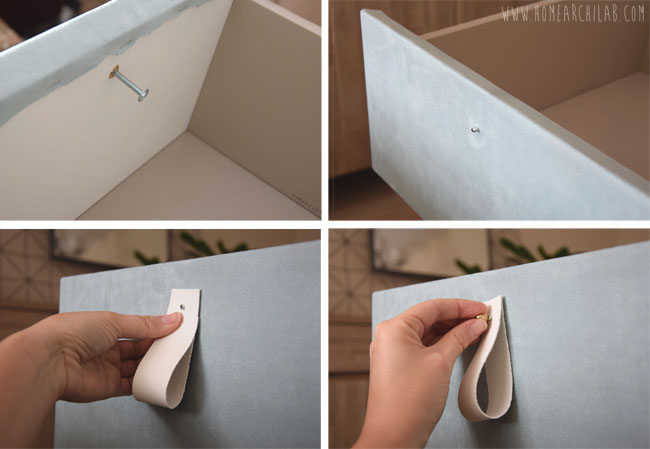
Photo: ©Home archiLAB
Those are all the techniques I used to do it, it’s just about repeating them according to the design we do.
The cuteness of this Malm dresser has to do with the combination of fabrics and textures.
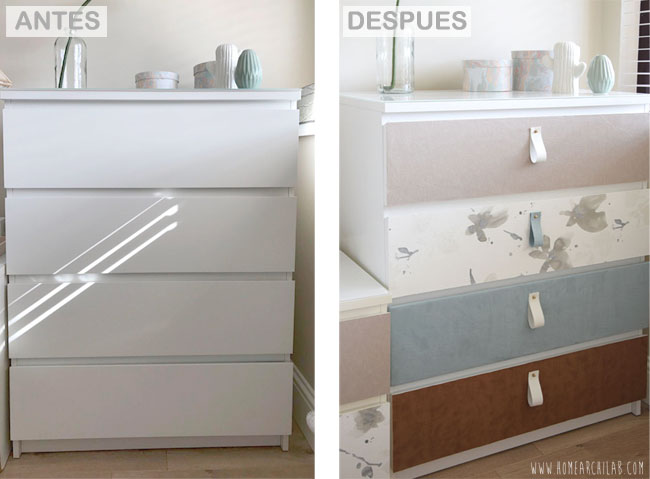
Photo: ©Home archiLAB
As you can see I also played with the shooters introducing one of them in blue (with the velvet cloth) so that it would stand out on the white.
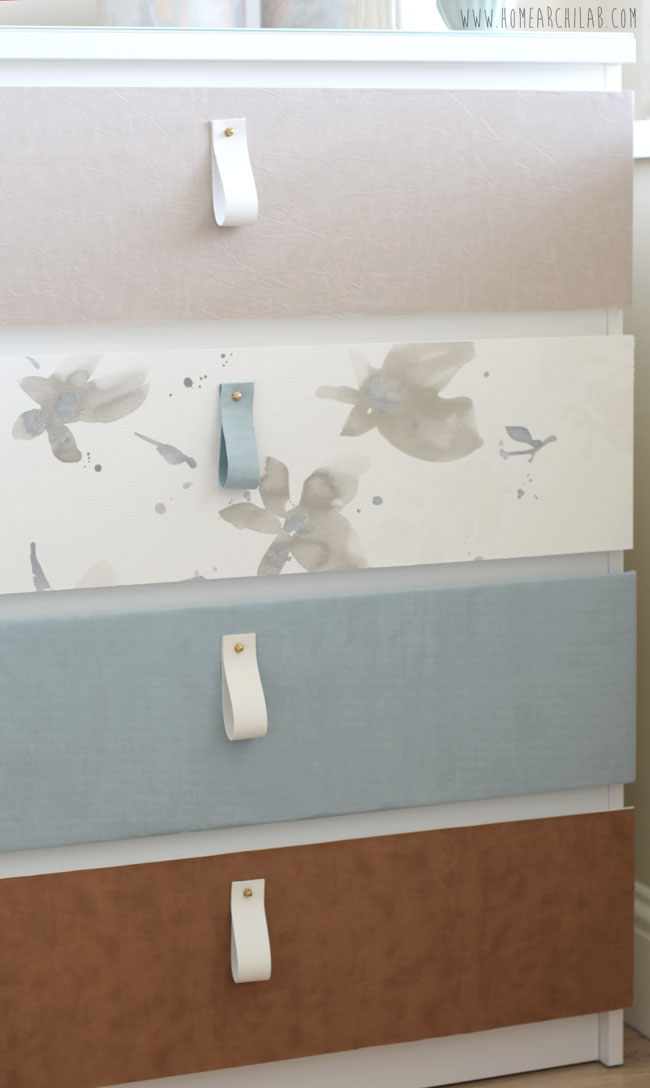
Photo: ©Home archiLAB
This game of textures and color also gives the nightstands a fun combination and I am sure that at first glance you would be able to tell me which one is Charlie’s and which one is mine. Although I have done nothing but combine the same fabrics / papers as in the dresser.
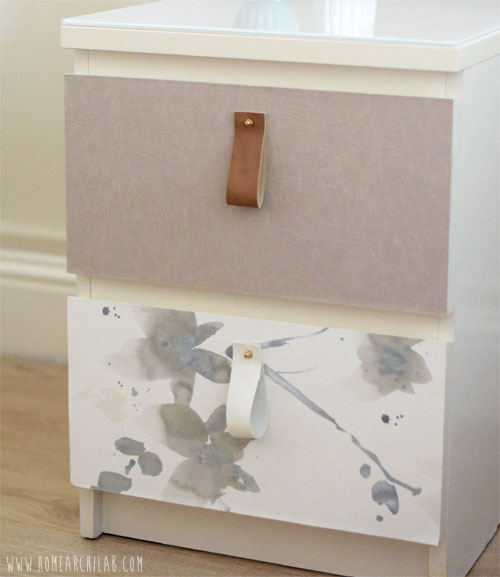
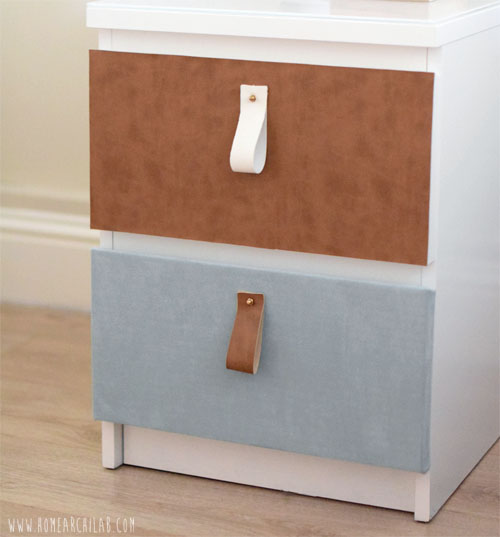
Photo: ©Home archiLAB
The leather handles also give it that sophisticated point, plus they are super trendy! And with them it is possible to erase a little more the footprint of the IKEA Malm series.
The truth is that we continue to open from the top edge and not from the shooter so as not to damage them. They can be used perfectly as handles but in this case the drawers are large, we have them completely filled and they weigh enough to open them by stretching from a piece of cloth.
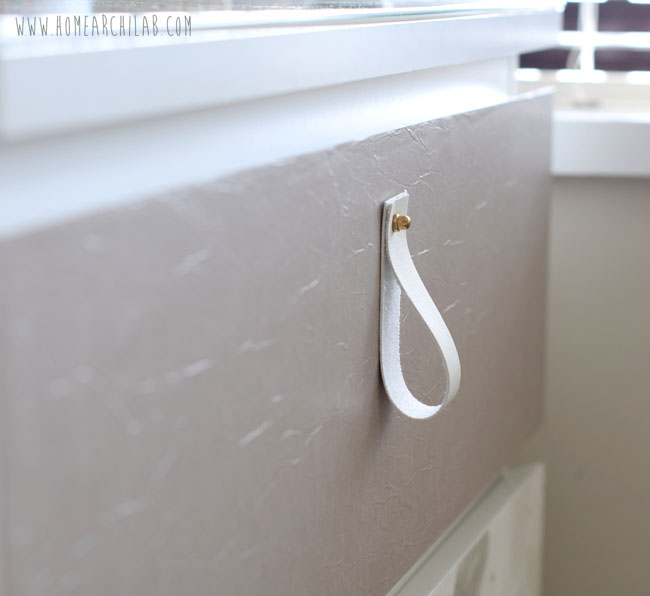
Photo: ©Home archiLAB
In the tables I also used handles in leather color with what in the end came to be 3 types of handles and 4 types of fronts, combined with each other in different ways.
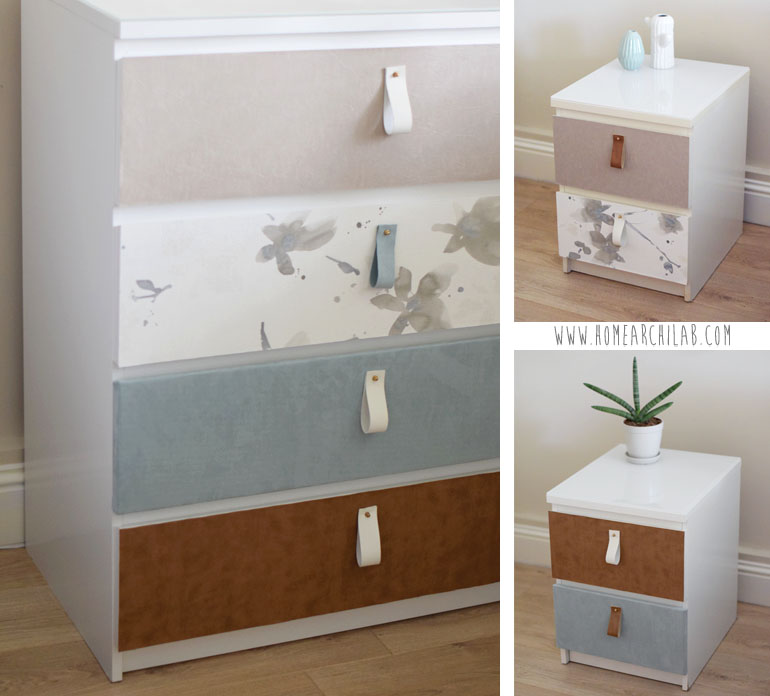
Photo: ©Home archiLAB
With this system you can look for the combination that best fits you but I recommend that you limit the prints and the color palette and within that you play with it however you want.
I also recommend the use of different textures (leather, velvet and textured wallpapers) to give warmth to the composition.
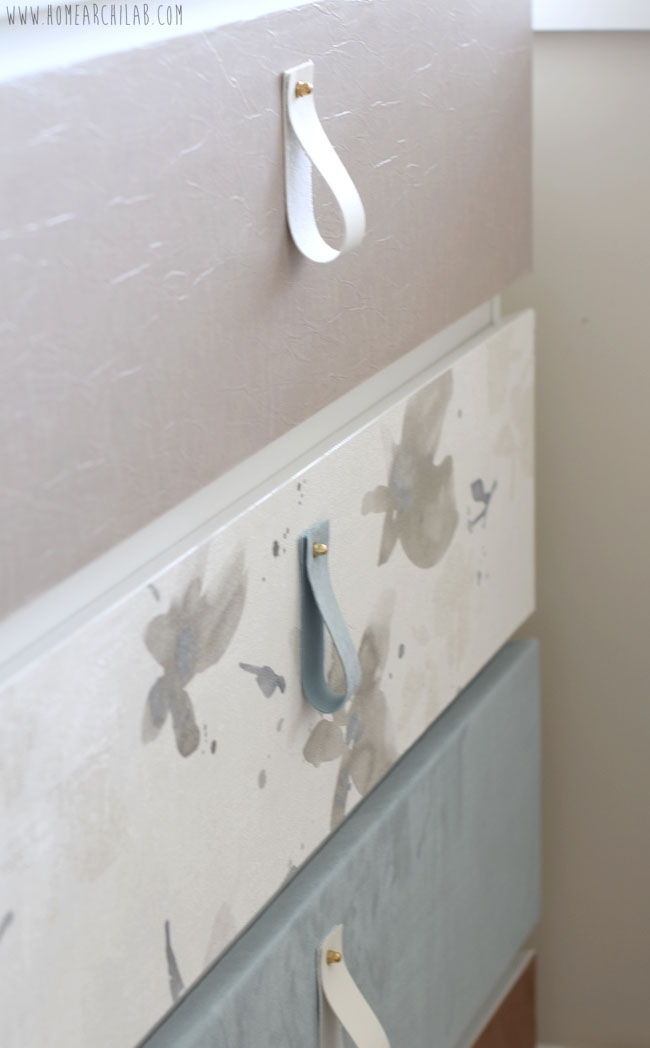
Photo: ©Home archiLAB
I hope you enjoyed the transformation of the Malm drawer and the bedside tables and keep an eye on the blog to see how it stands next to the headboard, the mirror, the staircase and a final DIY for the bedroom that is arriving. (Subscribe to not miss it).
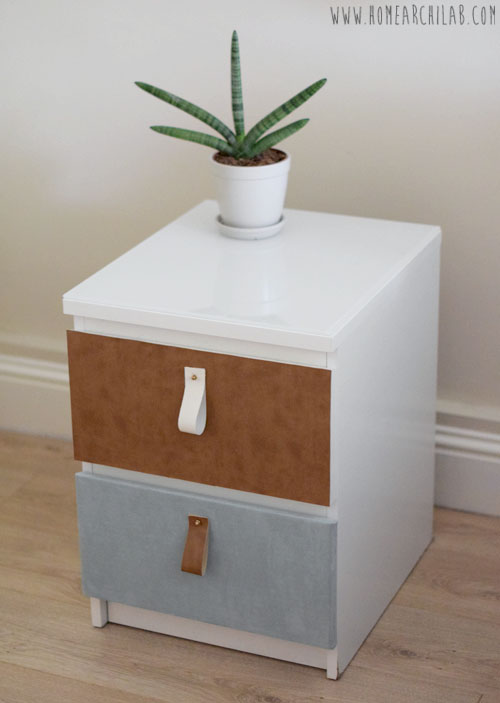
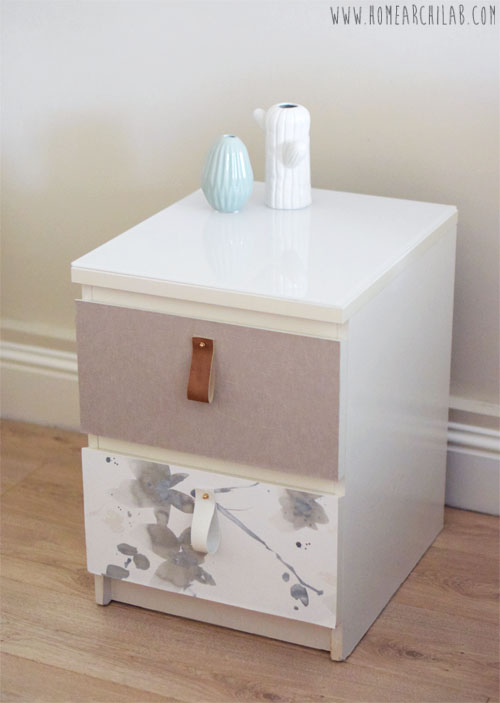
Photo: ©Home archiLAB
It will be a bright room, with personality and welcoming. The type of bedroom that invites you to stay because it gives good vibes.
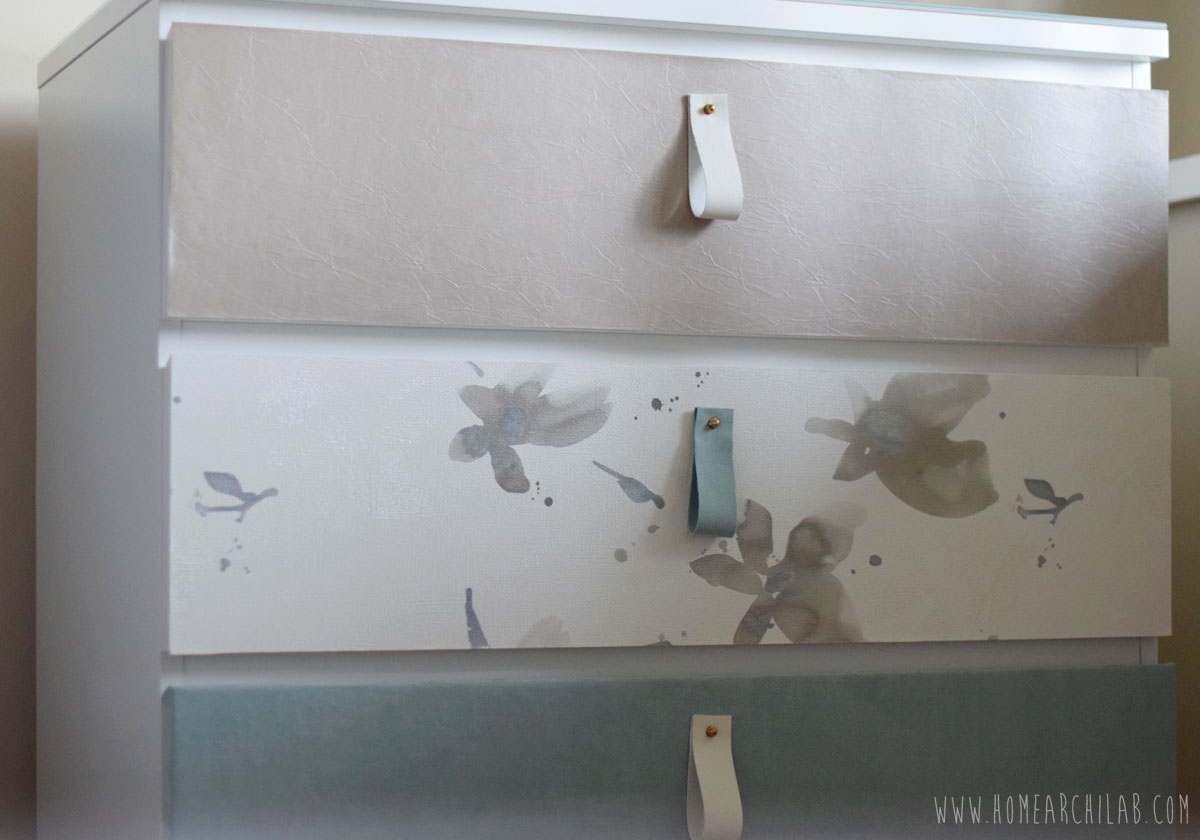
Photo: ©Home archiLAB


