
If you like DIY, and I know that because you’re here reading, I want to discover the things you can do with wooden embroidery frames. I could think of so many things that with one DIY I was short, so I’ll show you how to make a basket and its different uses. My idea was to create an organizer basket for my wool using two wooden embroidery hoops but it turned out to be so cute and versatile that in a few days I will propose a second part of the post with another veeeeeery different result!
This post comes from the hand of CreaVea, an online store of craft products that I met a while ago and where you can find anything you need. I recommend you take a look when you have a project because it is easy and comfortable, from home and without complications;)
The DIY has three parts: a common part to the sewing basket and also to the DIY surprise that I will reveal to you in a few days; another specific for the organizing basket; and a specific last one regarding the surprise that will come in said post. So differentiated, it will be easier for you to follow it decide for yourself to do just one for now.
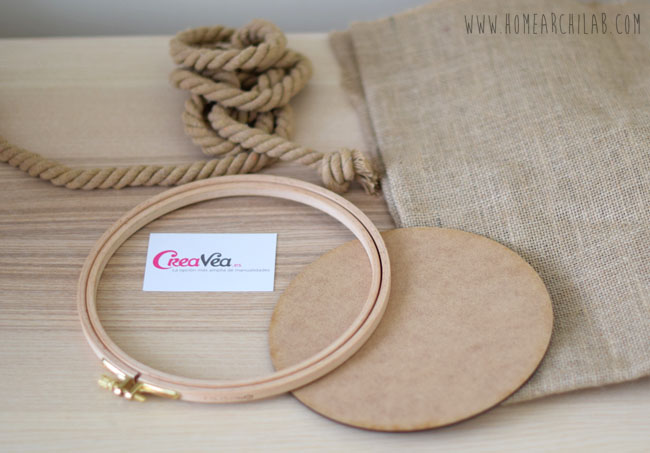 Photo © Home archiLAB
MATHERIALS
Common:
- 2 no. 19 cm embroidery frames
- 1 no. 18 cm wooden circle
- 2 no. Scrap of jute cloth, A4 size. If you like it more, you also have this one with dots that you would only need 1 no. Dots jute fabric
Specific basket of work:
- 1 no. Brown faux leather scrap (Expendable in the pot)
- 1 m Braided rope (Expendable in the pot)
PART ONE – COMMON
We start the DIY by THE COMMON PART using the jute or burlap cloth, known as «sack cloth».
You need a rectangle of 60 x 20 cm. Since I already had a scrap at home, I cut a rectangle of that size and joined with needle and thread, its short sides.
If you use the two A4 scraps of CreaVea, each is half the rectangle, so you will have to join them on the sides, resulting in two seams instead of one.
Once sewn, I turned it over so that the seam was inside.
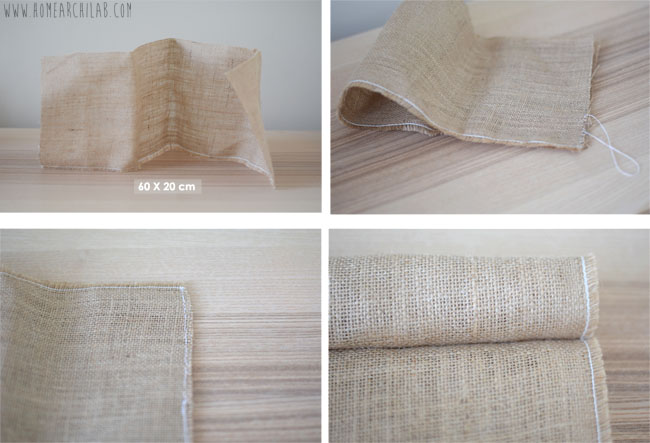 Photo © Home archiLAB
Then I placed the two embroidery hoop, one on each end of the cloth cylinder.
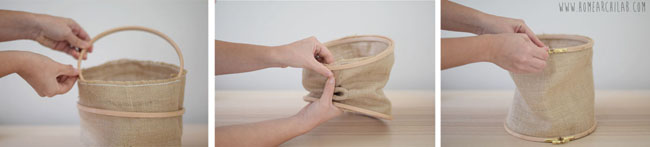 Photo © Home archiLAB
The easiest way to do this is to first insert the outside of the embroidery frame and then the inside making them match the fabric between them. When aligned, close the frame nut slightly and move it to the end. When it is in place, tighten the nut completely so that the fabric does not come off.
SECOND PART – SEWING BASKET
With this we have the base and now we are going to finish the basket.
To do this, place the wooden circle inside one of the embroidery frames.
The inner diameter of the frame is just the diameter of the circle so it fits perfectly and stays tight. If you are going to use the basket for heavy things, other than wool, I recommend putting some hot glue or silicone on it.
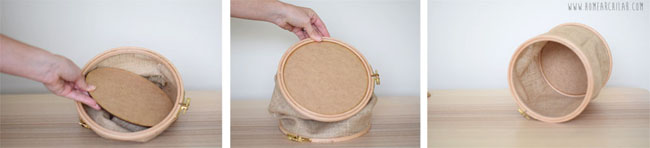 Photo © Home archiLAB
The last step is to make a handle for the sewing basket with the braided rope.
It is a very cool rope because it has little colored dots and it is thick, but the problem is that it is easily undone on the edges. I recommend that you tie a knot on each end just as you receive it to keep its full length.
With a piece of leather fabric about 7×2 cm, surround the rope and sew the two parts of the strip tightly to the rope. Cut the leftover leather and finally sew it to the basket by the same stitching that you already had.
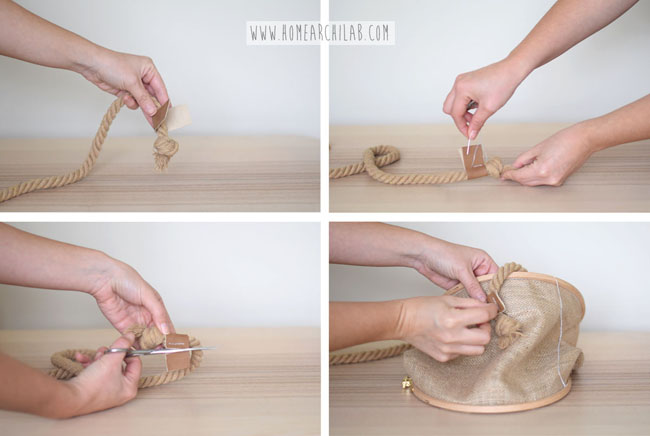 Photo © Home archiLAB
We have finished the sewing basket. Organizing baskets are very practical, it is not necessary to use it for work. A place to organize is always good!
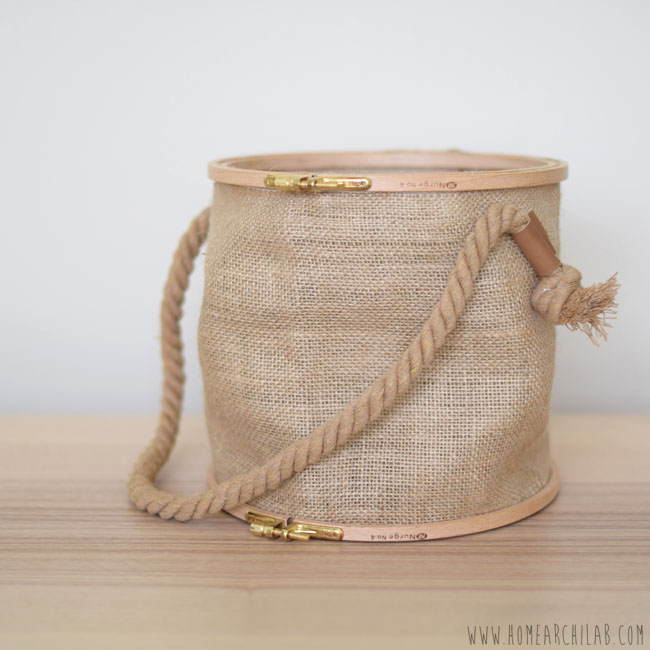 Photo © Home archiLAB
The handle makes it more comfortable to hang anywhere.
 Photo © Home archiLAB
I use it to organize my wool and some scraps. Not because I know how to weave, that I have no idea of, but I have wool and fabrics for my DIY projects that I need to put somewhere.
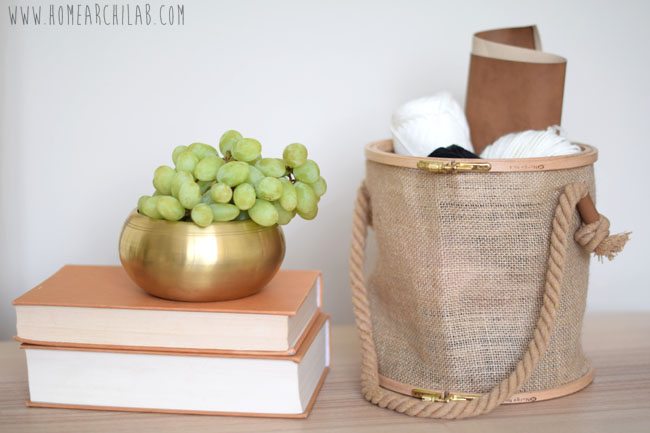 Photo © Home archiLAB
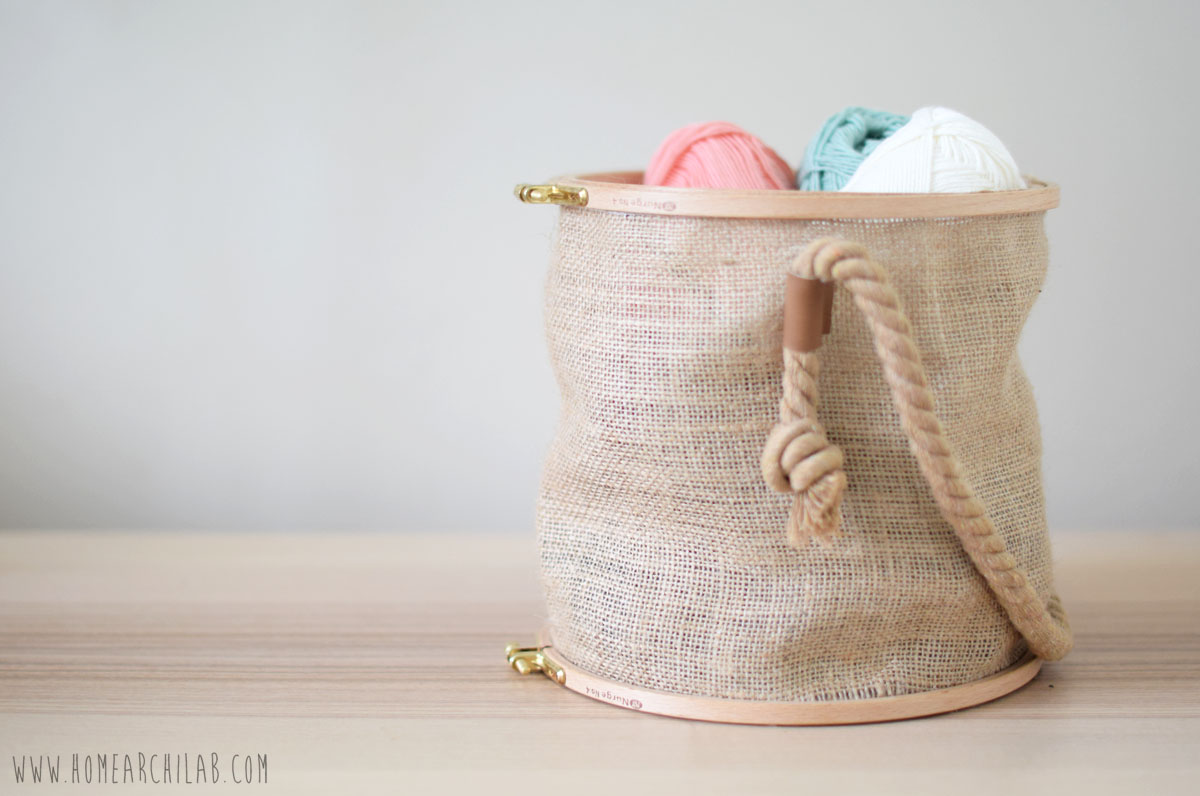 Photo © Home archiLAB
En cada DIY que hago pongo la habitación taller patas arriba porque me gusta tener todo a mano y porque improviso e invento cosas sobre la marcha. Me viene genial tener todas las lanas juntas y poder colgarlas en el pomo del armario o transportarla con facilidad.
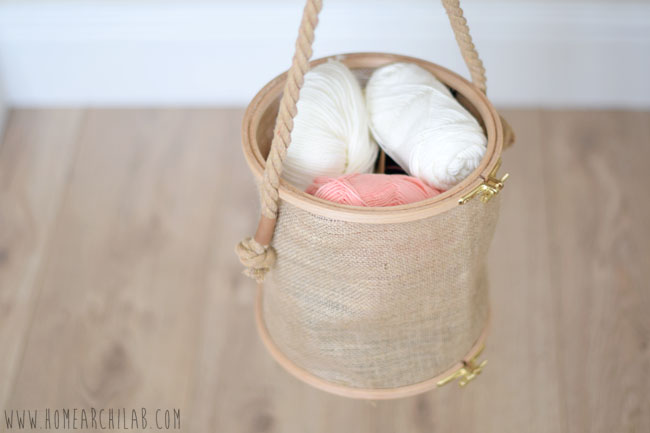 Photo © Home archiLAB
In every DIY I do, I put the workshop room upside down because I like to have everything at hand and because I improvise and invent things on the fly. It’s great for me to have all the wool together and be able to hang it on the cabinet knob or transport it easily.
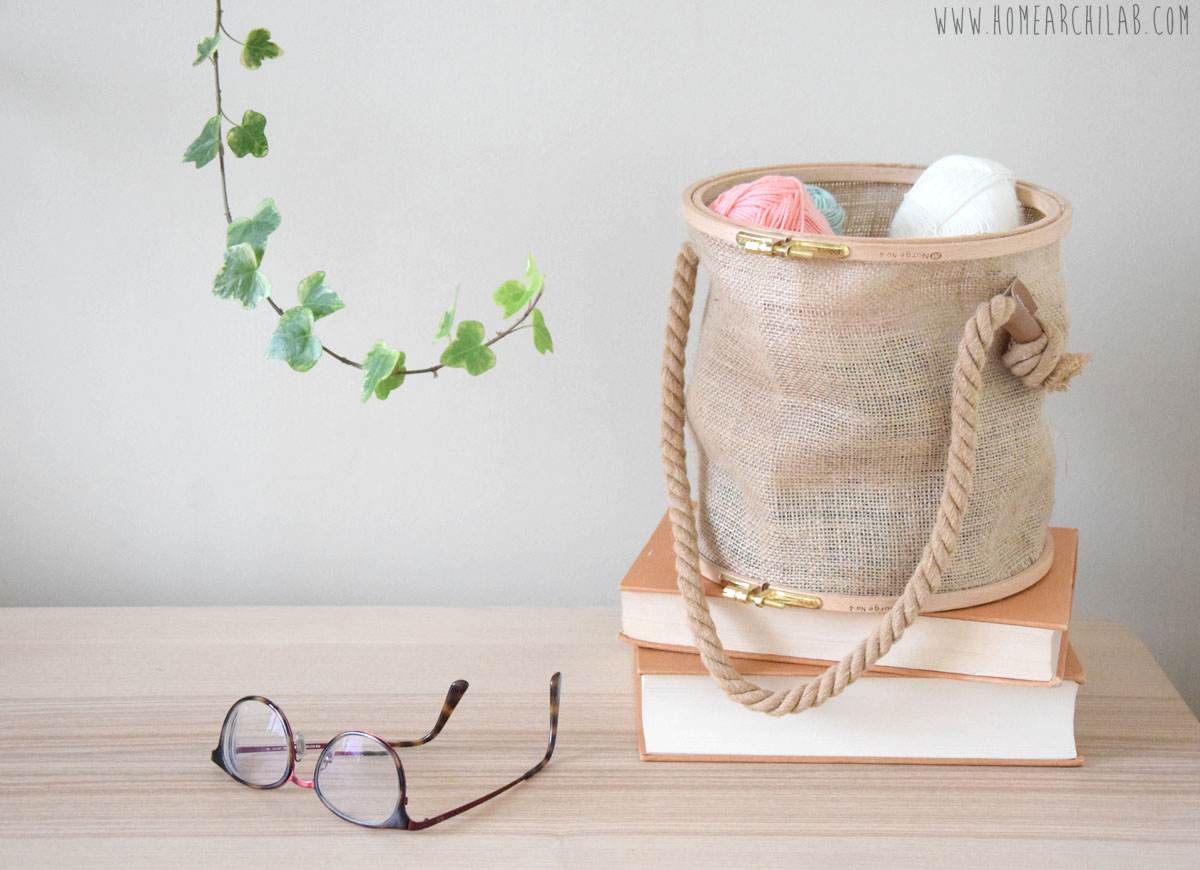 Photo © Home archiLAB
But cloth baskets are also very fashionable, so you can use it as a decorative basket.
For example, it can be used as a flowerpot basket:
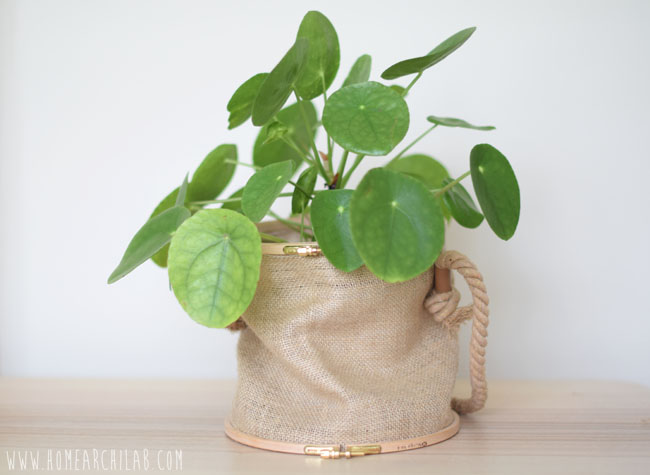 Photo © Home archiLAB
And the good thing is that according to the size you need you can adapt. The how to make larger fabric baskets is exactly the same, only that you would have to cut the fabric with the right dimensions to the larger frame. The long side of the rectangle must coincide with the length of the intermediate circumference of the frame (outer face of the small ring).
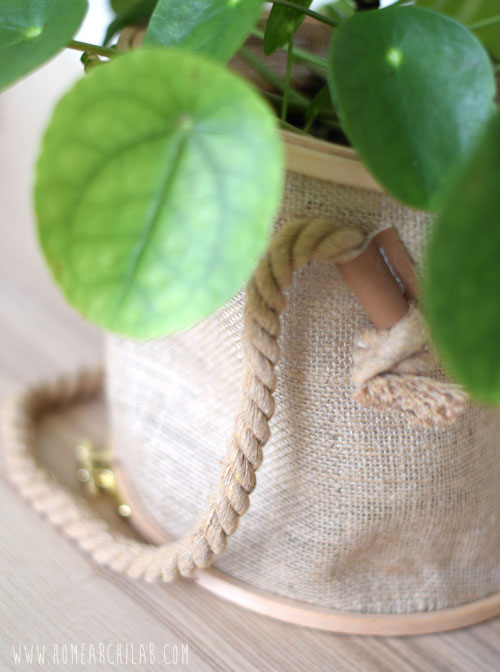 Photo © Home archiLAB
Wood, jute, rope, leather, gold metal … don’t you think it’s a great decorative basket ?. I love it and it’s easy and cheap!
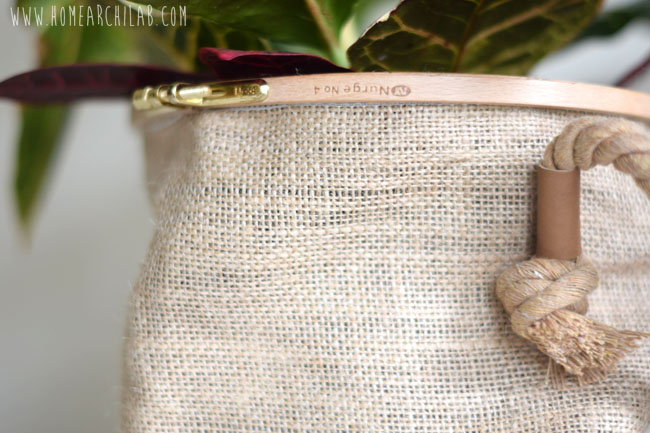 Photo © Home archiLAB
I wait for you on next post with the second part of this DIY basket in collaboration with Creavea where you will see a totally different and surprising use!
If you do not want to miss it, suscribe here.
I will only send you emails to notify you of new publications, so you will always be up to date.


