Do you have a gift to make soon, want to be original and spend little money at the same time?
This week I want to show you a very simple, personal and attractive way to prepare a gift for a friend: a pot with a personalized message.
It can be used for close friends to whom you can add a very personal message, but can also be used for a friend / acquaintance whose tastes and hobbies you may not really know.
And of course, it also works if you just want to have a house with some very cool plants !!
It turns out that a few days ago I met Eva, an Irish architect who I’m helping out here in Dublin in her studio. Just last week she told me that next week was her birthday and I thought that I, who I tend to pay attention to little details, thought I would bring something. Because that always makes the anyone’s day, and even more if you do not expect it!
I quickly thought of giving her a plant with a pot painted by me, since a plant always gives life to any corner, and if it also comes with a personalized pot, it is a touch that differs from any other useless stuff you can buy with that same budget (in my case the pot cost 1,80 €). Furthermore, I just met her, so I don’t have references of what she may or may not like…
To paint this pot, I used some very special paints, the most important being slate painting, to paint surfaces on which you can later write on with chalk. I bought it in Sostrene Grene, a store I will speak more about some other day, but that in any case I recommend. In any case you can find this paint where you usually buy decorative paintings.
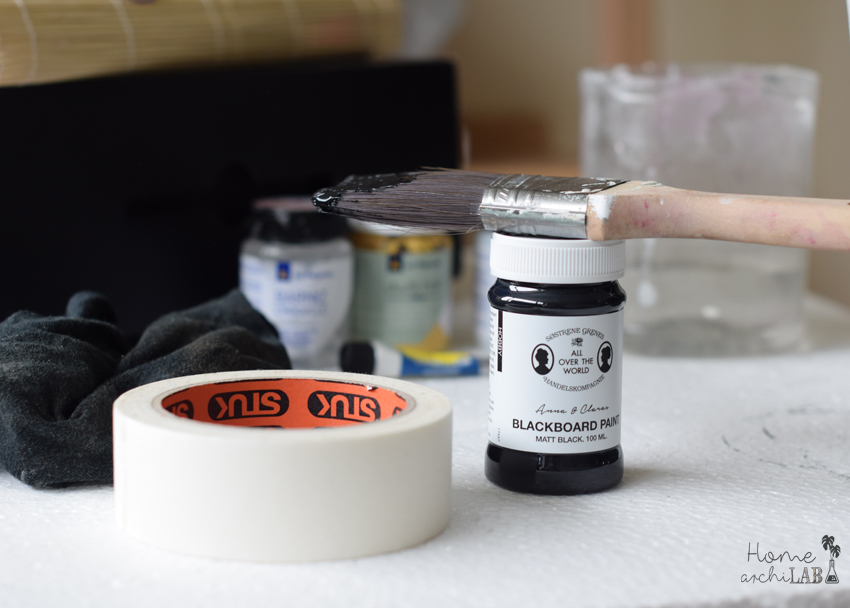
I also used Chalk Paint paints for the yellow band and for the white dots.
If you look at the images below you will see that when I started to paint the yellow band, I used an acrylic paint that I already had because the I preferred its color, but … looking at the result it is something I do not recommend!! Even though I applied many coats of paint, I did not get a homogenous finish.
At the end I decided to use the Chalk Paint ocher I had, which although it was a more muted yellow, I would get a much better result. You can see in the third photo of the series the perfect finish that is achieved with a single hand of Chalk Paint.
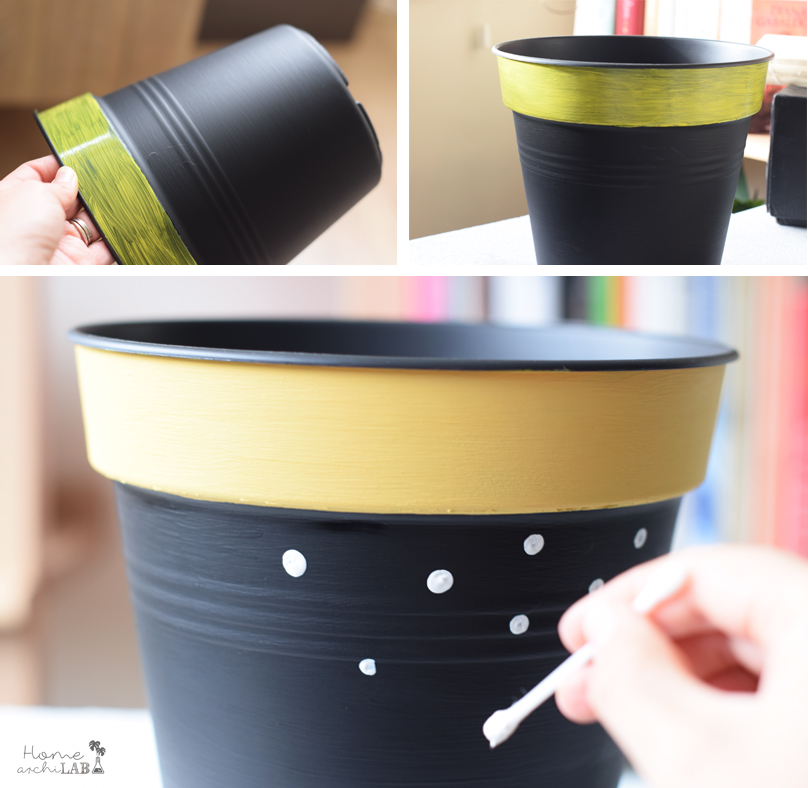
The process is very simple:
First I painted the black part with the paint of slate because it takes much longer to dry.
Then I painted the yellow band, and when it dried I applied a matt varnish Chalk Paint as well.
When the slate painting was dry, with a cue-tip, I painted the white polka dots, leaving a gap in the front that would be the place for the message.
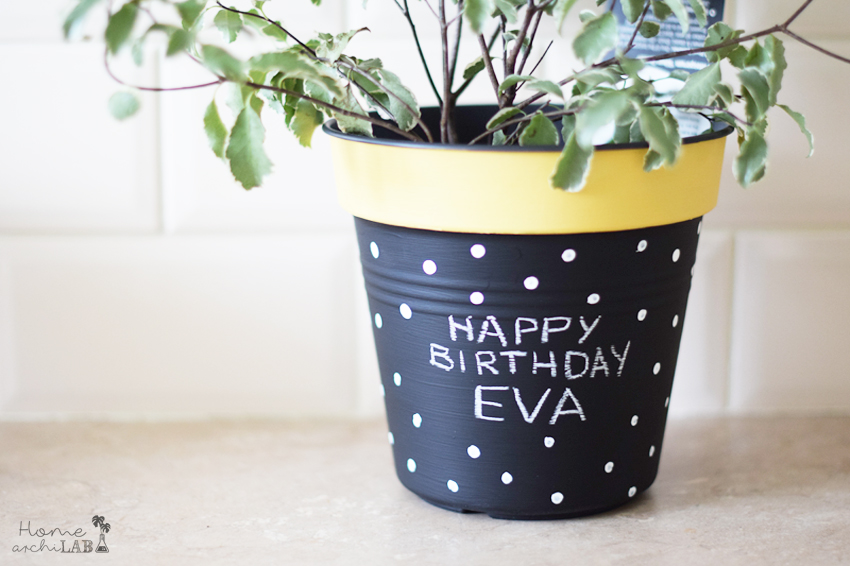
And there you go, my cute flowerpot for Eva.
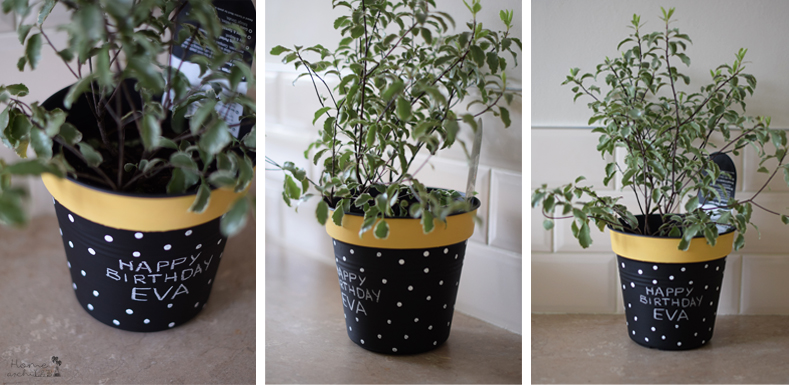
I wrote her a Happy Birthday message but I included some chaulks in a box so she can erase it and write whatever she wants on that space.
What could you write?
Well a phrase that gives you encouragement, a cartoon, or if you are really bad at taking care of plants, you can use some of the messages that I used in this other pot that I will go over next.
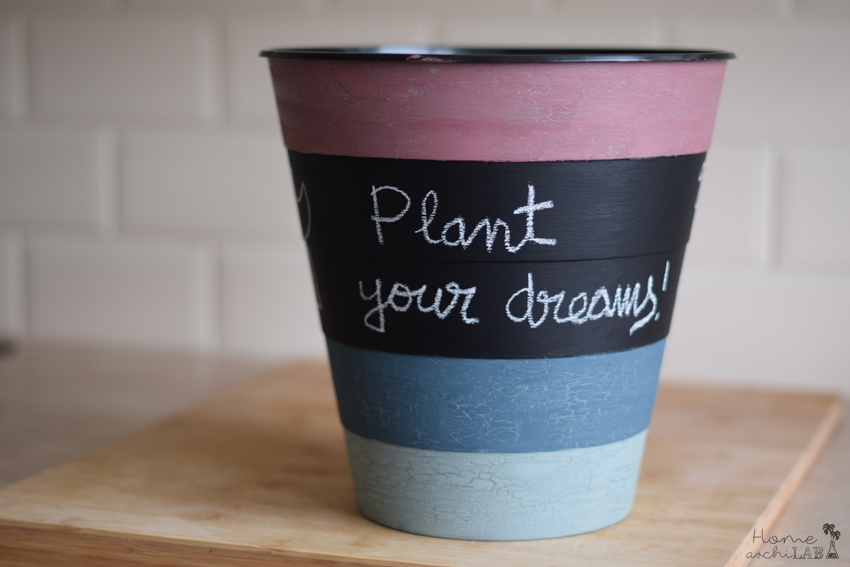
In this case I also used blackboard paint, different color Chalk Paint paints colors (whose reference you can see in the photos) and the star paint: a Crackle Varnish.
What is this? You will see it, but roughly speaking it is a varnish that makes a painting crack, and through the cracks you can see a different color paint, that had been previously applied.
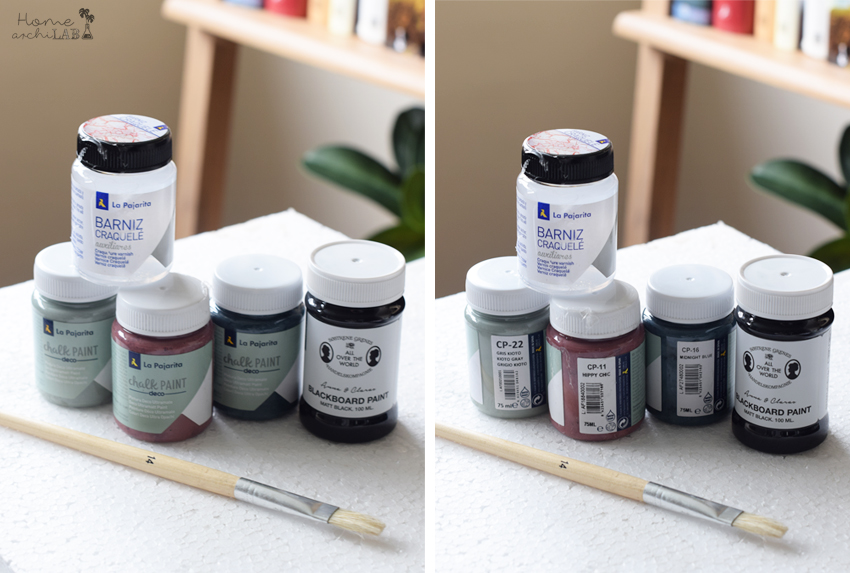
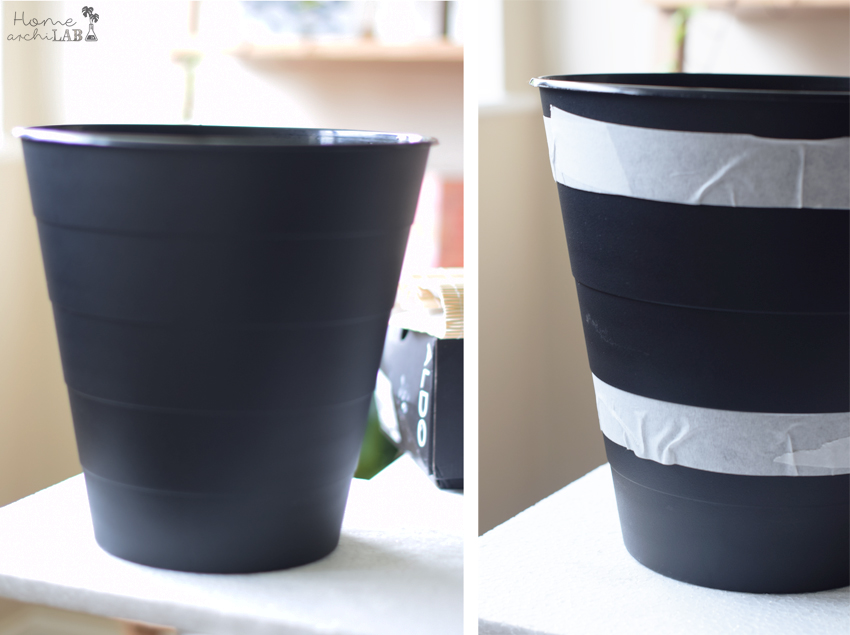
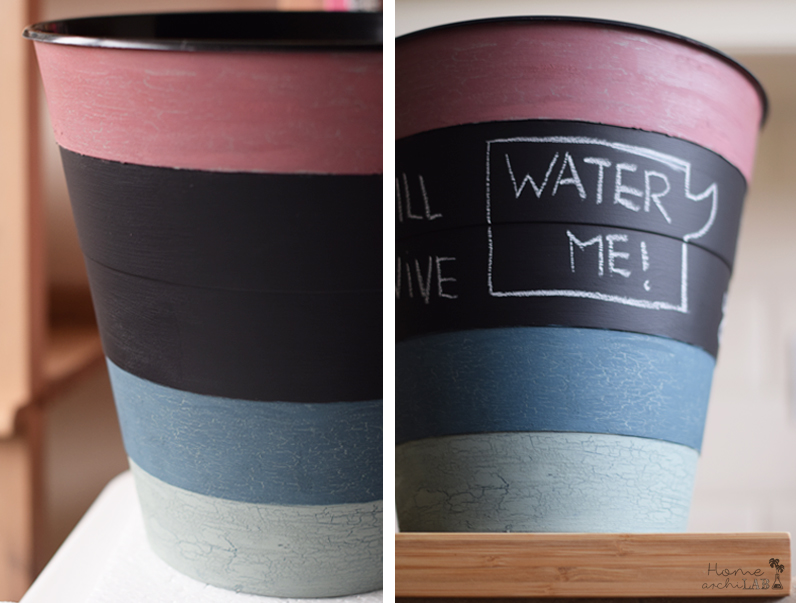
It was a black plastic pot of Ikea that was divided into 5 bands and I decided to paint it based on these same bands. The two lowest of different colors, the next two in blackboard paint and the top one again with another color paint. To all the colors, I applied the varnish craquelé.
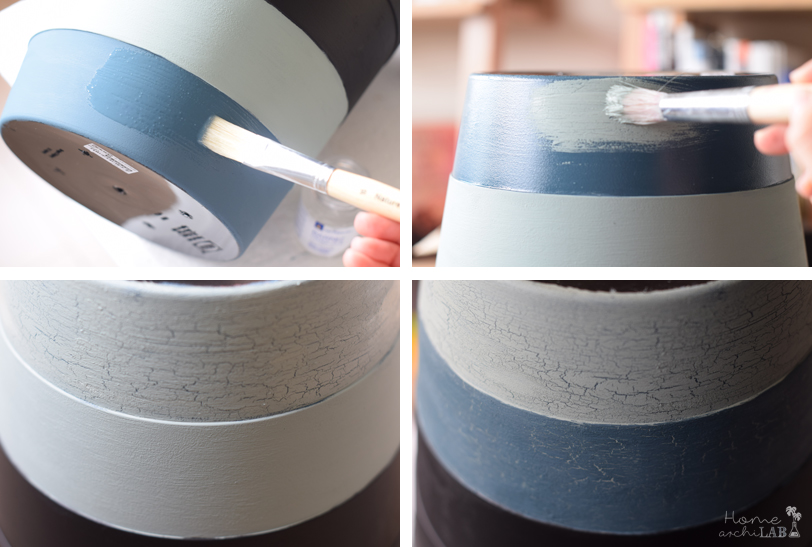
The first thing to do is to delimit the new area to paint, helping yourself of the tape. It has to be carefully done because the pot is a trunk of cone that makes it difficult to glue straight. You will have to make small folds doublets to rectify the shape.
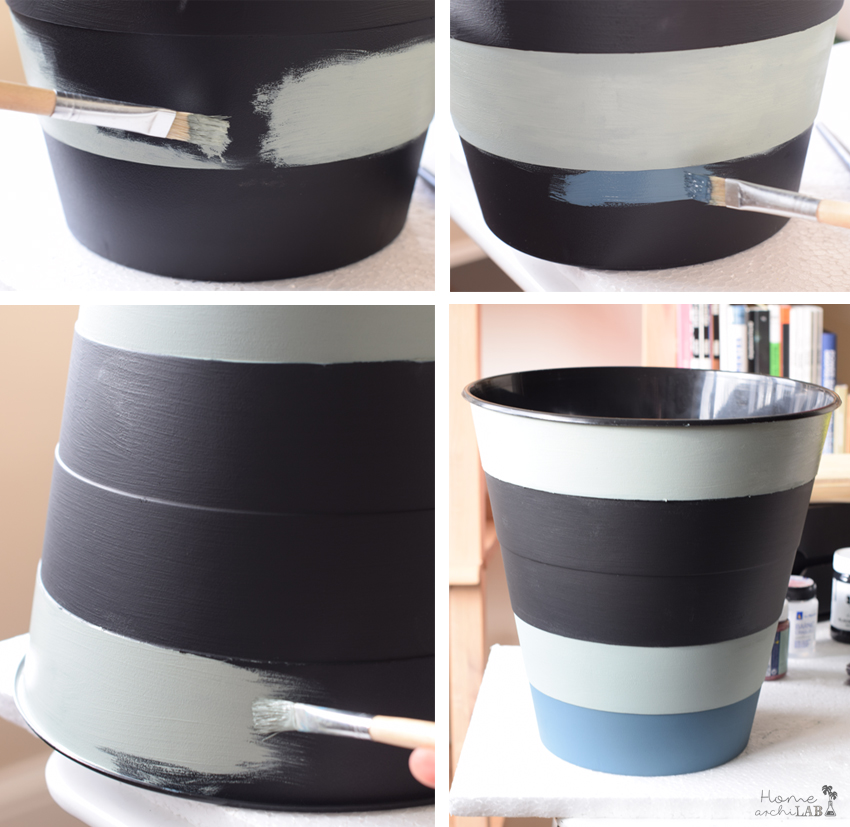
First, I painted the blackboard because it is the one that takes the most time to dry.
Then the background color (ie the color to be seen through the cracks), a little lighter. If two colors are in contact it is better to always start with the clearer because in case you stain the other color, as it is darker you can cover the light stain easily. The reverse is more complicated because the dark colors are difficult to cover with light colors.
So I continued to paint all the background colors of each of the bands and let them dry.
Once dry, apply the cracked paint on the colors and let it dry.
Subsequently, on top of this dried varnish, paint with the final color, which will be the paint that will crack within a few minutes of applying it.
It is important in this step not to paint again. Wet the brush beforehand with water and drain slightly. Then load enough paint with a flat and homogeneous brush and paint with continuous and long strokes.
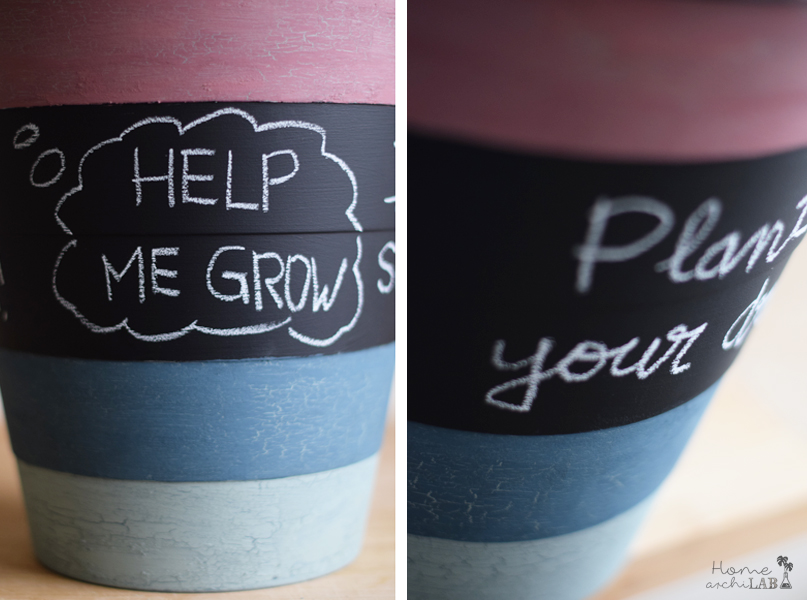
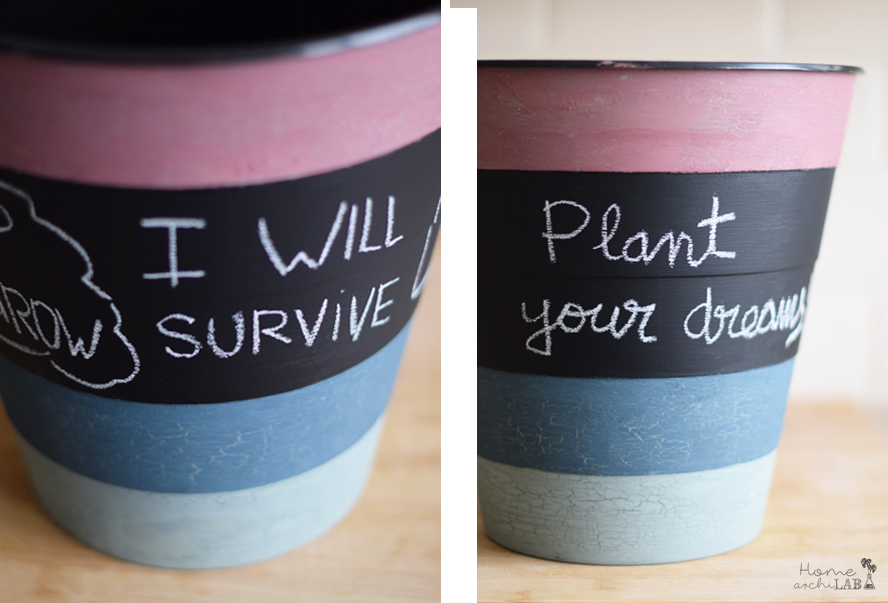
You just have to write the messages on the chalkboard part with a chalk, which can be as fun as these:
One last application of these same materials is this frame that was a bit damaged.
I painted a pink base, which would be the color that would appear through the cracks, then the varnish and finally a white paint (Ivory of Chalk Paint Vintage).
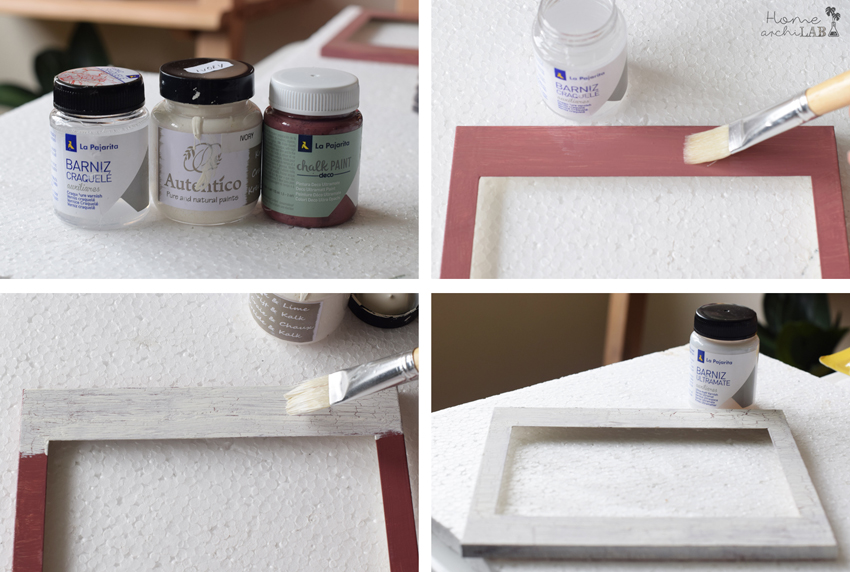
The result is a very original frame that you can integrate wherever you want, because you choose the colors!
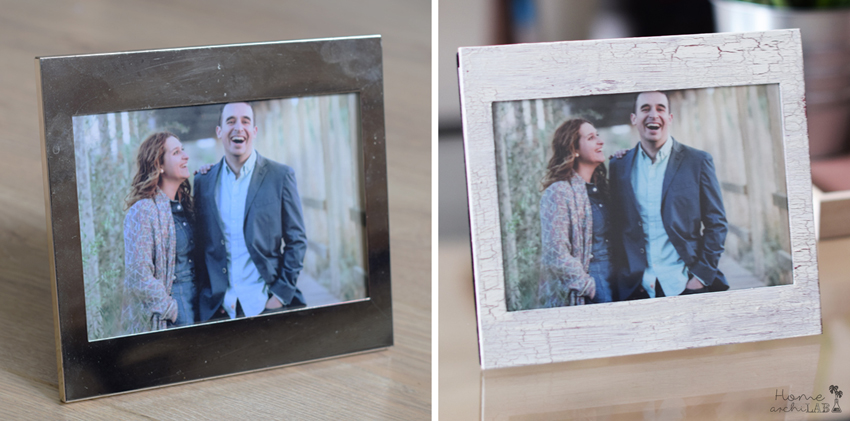
What do you think my pots and the great potential of this varnish?
Do you have some gift to make soon and you want to be original and spend little money?
As you will have started to realize, I really like the natural elements, which I already told you in this other post about Natural decoration with branches that cost nothing and give a very chic touch.
Give away plants, they are a fundamental element in the decoration. They give joy, life and warmth to spaces.
If you want more ideas about pots decoration you can visit mi board on Pinterest named Pots: See more pots.