
My first adventure in the DIY world was the headboard and night tables with wooden fruit boxes I made last summer. It was easy, inexpensive and exclusive because it is totally customisable.
It was for our room in my in-laws’ house, which we were going to start using quite a bit because of our forthcoming move to Dublin. This house would be one of our “base camps” when we came back to Spain on holidays.
My in-laws changed the two single beds for a double, so the two headboards disappeared and the bed by itself made the room looks empty. Moreover, I had plenty of time and I was keen, so I got to work.
I thought of including a new element that was more in line with our style, and that was easy to do. I could have decided on a thousand other possible ideas other than the headboard. (Someday I will show you a compilation of these other ideas that I was thinking of). This idea, which I found in Pinterest, was finally the winner.
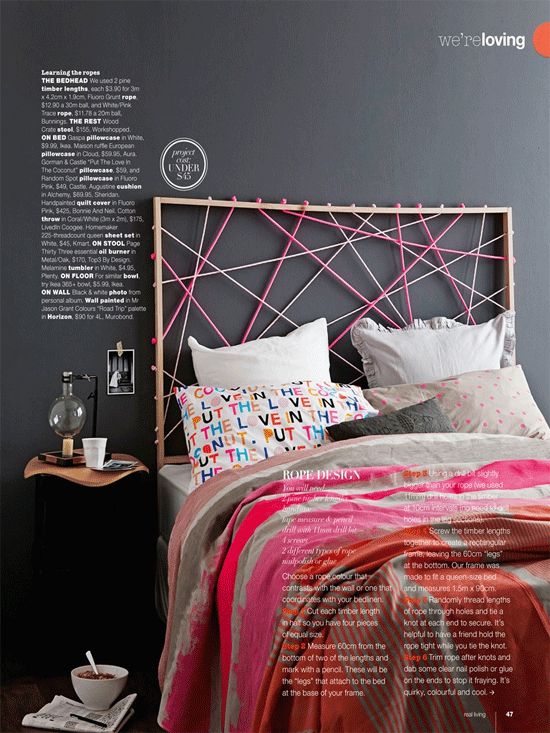
Although in my case it would be a little different as I chose other colours that fit more with the room’s entourage, and I did not have a dark wall. So I decided to introduce some changes to the idea.
MATERIAL FOR GEOMETRIC HEAD – 150X120 CM
-(70x20mm) Wood strips. Two of them: 1500 mm long and other two: 1140 mm long.
I recommend they be made of a hard wood because they are too long and they can bend. If they are made of pine wood, they will need a greater thickness. (I will tell you later the problem I had with this).
–White glue for wood
–Nails and a hammer
– (1500×1200x3mm) DM board
–Golden pushpins
– 10mm width, colourful tapes (I used elastic velvet in 3 colors: white, light gray and brown, but you can choose a different kind of fabric and colours)
–Dark gray paint
-Natural varnish
–Brush and roller
– Course grain sandpaper
-Small scissors (scissors to cut hand nails are the best size)
In the process I had some problems that I solved as I went along. I will recount the steps I followed to go along with the pictures, but I recommend that in order to avoid the problems I experienced, the headboard is assambled in a different order that I will point out at the end (we also learn from mistakes).
In my initial idea the headboard was not going to have a back (element that I introduced at the end to solve one of the problems). It was going to have only a wooden frame and tapes crossing it. So I started assembling the frame:
ASSEMBLE THE FRAME
If you do not have a saw and a mitre box, it is difficult to do a mitre joint on the edges. That is, making a 45º cut in the corners of the strips so that as you join them together at a 90º angle, only the outside is seen.

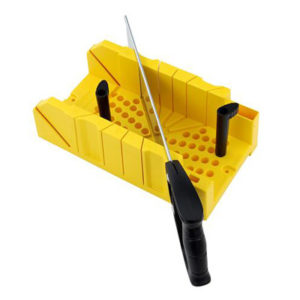
This would be the advisable option, but it was not my case because it was my first DIY !! So I simply supported one (horizontal position) strip on the other two (vertical position) and joined them with white glue. I also put a few nails in each joint to reinforce it (I knew that they would not be seen because the height, where the headboard would be hanged, would be high enough. The nails would be in the upper face looking at the ceiling and in the bottom face looking at the floor).
PAINT / VARNISH THE FRAME
The next step was to sand and varnish it. I wanted it to be as natural as possible and the wood was visible, so I only used a natural varnish.
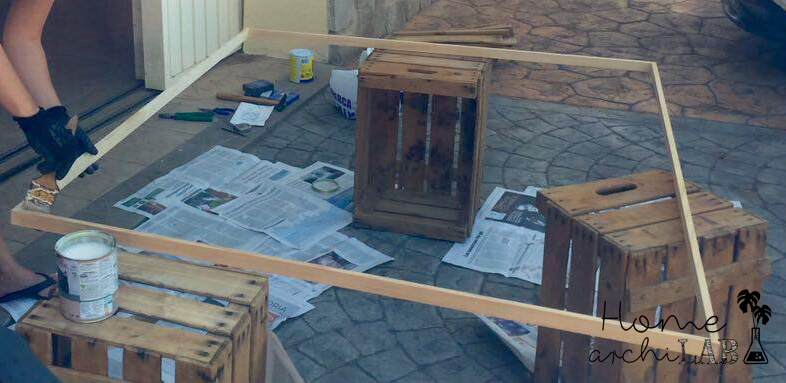
Photo ©Home archiLAB
PLACING THE TAPES
After drying, and after drawing on paper a numbered sketch of how I wanted the geometry of the strips, I made small marks on the strips with the subdivisions. This helps a lot to keep them equidistant and to not make mistakes.
First and foremost you have to design it and draw it on a squared paper and you have to assign numbers and letters to each point.
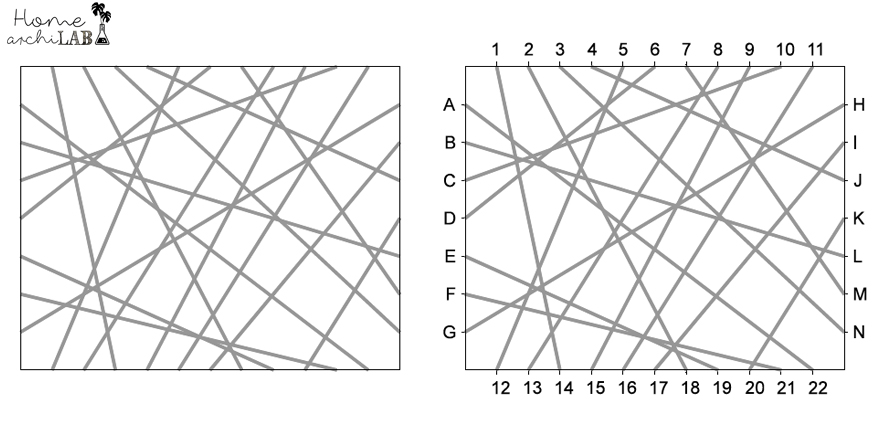
The following is so simple that my 6-year-old niece helped me. It’s like playing Battleship.
One end of a strip is always held into the outer face of the frame with a pushpin, and with the rest of the roll, you continue until the desired end-point (without cutting the strip). Simply go following the sketch drawn and nailing each letter with its number.
The final pushpin is nailed when it is tight (do not let it combe) and when it is tightly held, the tape is cut using small scissors so the surplus is not visible.
PAINT THE BACKBOARD AND NAIL TO FRAME
Here came the problem in my case, the frame was too soft for the length of the sides and the pressure exerted by the strips caused the frame to flex and twist. I already had all the strips finished so undoing it was not an option.
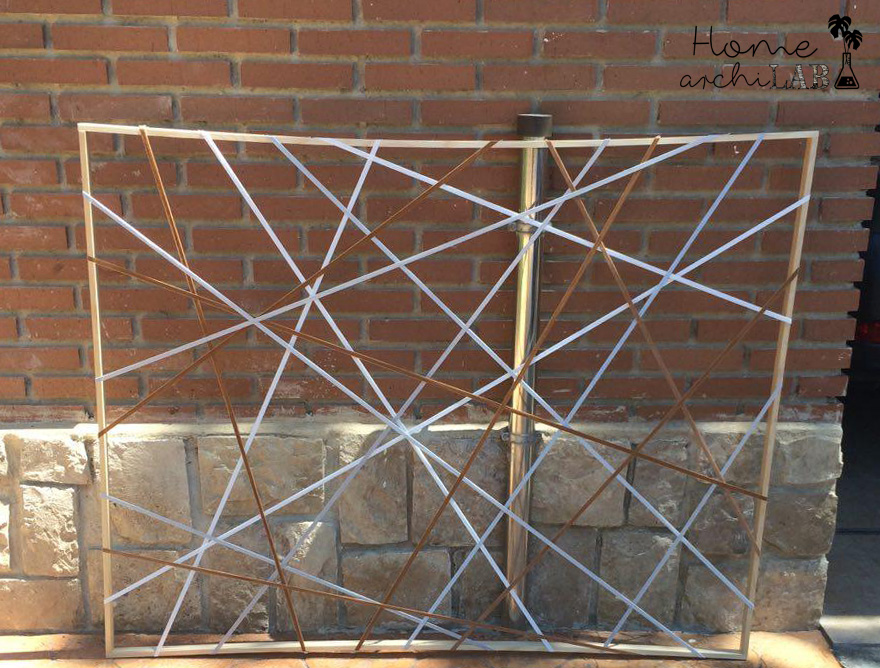
Photo ©Home archiLAB
The solution was to buy the DM wood board with the dimensions of the frame (including the thickness of the strips) and nail it from behind the entire perimeter of the frame.
Prior to this, I had to sand, paint and varnish the board, for which I used a roller, this way you do not notice the brush strokes.
Once the lesson has been learnt, the correct process would be:
1.- Sanding, painting and varnishing the DM board. Let dry.
2.- Sand and varnish the frame. Let dry
3.- Assemble the frame by attaching its 4 corners and nailing it in the perimeter of the DM board.
4.- Place the strips on the frame by nailing them with pushpins.
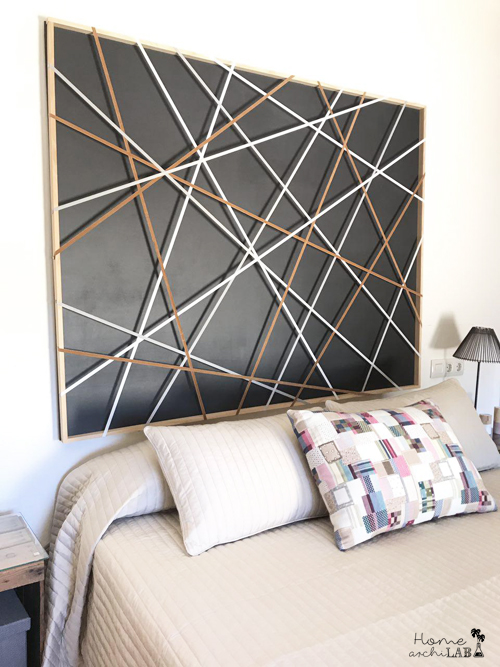
Photo ©Home archiLAB
Once finished, we can hang it.
Keep in mind not to hang too low, so that the pillow does not touch the headboard while we are sleeping.
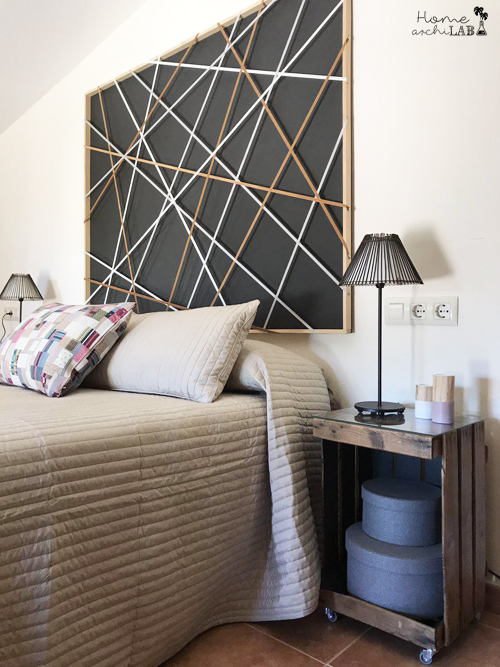
Photo ©Home archiLAB
This headboard has a million really cool options if you change the colour of the back, the colour of the tapes and the position of them. We will see it in a different post.
NIGHT TABLES WITH WOODEN FRUIT BOXES
For the night tables I used old wooden fruit boxes which I bought from a farmer for 5€ each, even though they were a bit rugged as can be seen from the above pictures.
I only have a few pictures of the night tables, but I’ll try to explain the process as it is very simple. Before you start, you will have to check that the box is in good condition, or if a few planks or corners need repairing. In my case, there were a few nails that had come out and I had to put in new ones.
1- Wash the boxes throughly with water and soap. This process is important because the boxes had been previously used
2- Sand with rough sandpaper. I used gloves because the boxes were made of a soft wood and had many splinters.
3- Paint with a sealant. This step is important because with this type of wood even though we will never have a completely uniform box, we will greatly improve the end result and the grip on the paint or varnish. Let the sealant dry.
4- My boxes had rotten vegetable stains on the inside that were impossible to remove. As the interior of the boxes were going to be seen when you placed them vertically I decided to paint the inside the same colour as my headboard. This way I would have a matching night-table.
Before I painted I had to place adhesive tape all around the perimeter of where the color would change, that is on the edges so that when I painted the edges would look clean. After placing the tape, you have to paint the inside with various coats and let dry.
5- Once the paint has dried, you will have to paint the rest of the box with a walnet (or other colour) varnish. I used a colourless varnish on both the inside and the back of the box.
6- After drying, you only have to screw in the wheels in one of the sides of the box. First you will have to create the holes with a drill, and once they are created, screw them in.
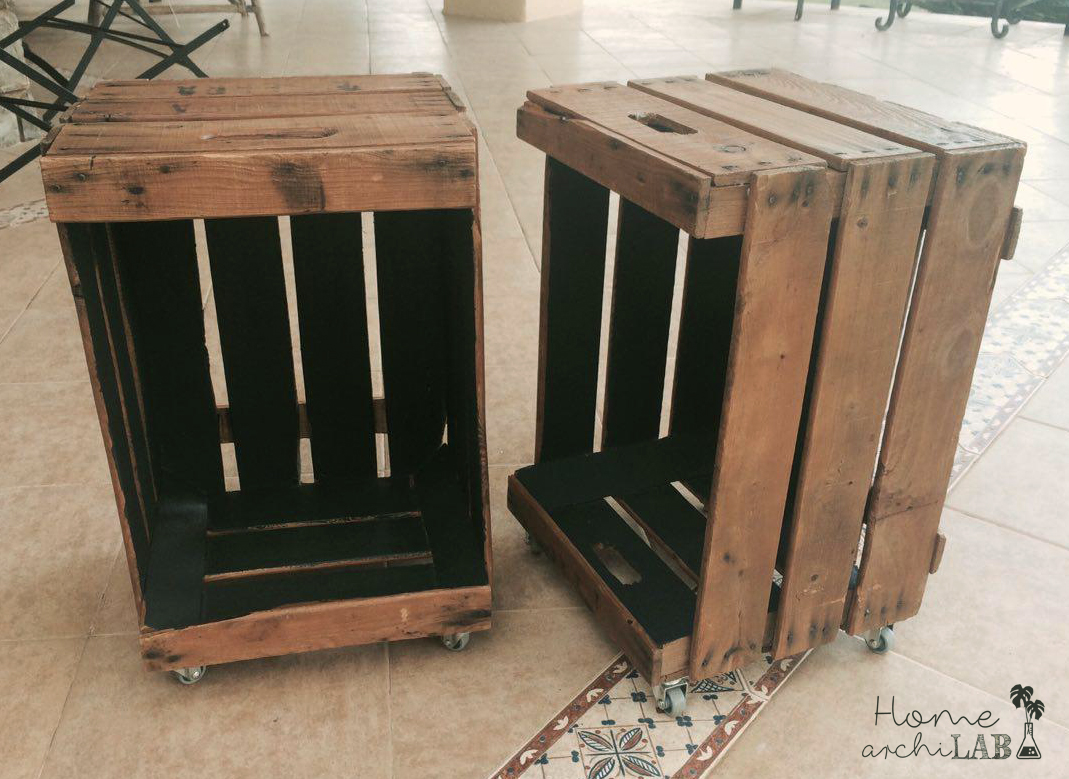
Photo ©Home archiLAB
I bought a matching size glass for the top of the table, so that I could place objects without they falling through the grooves.
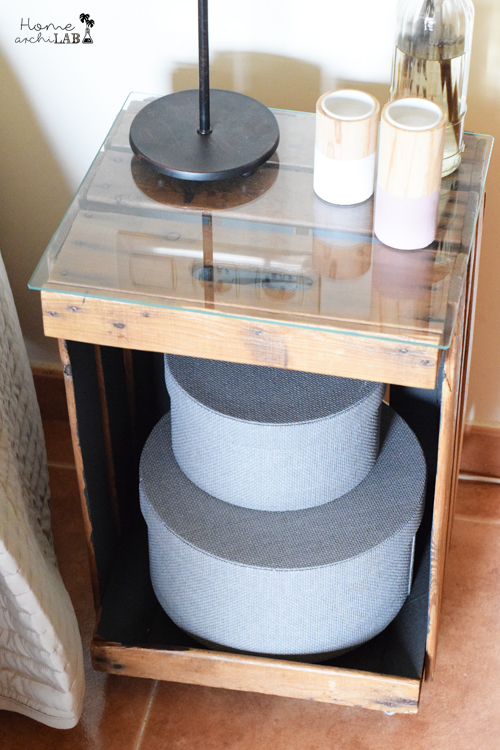
Photo ©Home archiLAB
To be able to make use of the night tables as storage, I placed cardboard boxes I had previously lined with grey coloured cloth inside the night table. It is a useful way to make use of this space and always keep everything tidy.
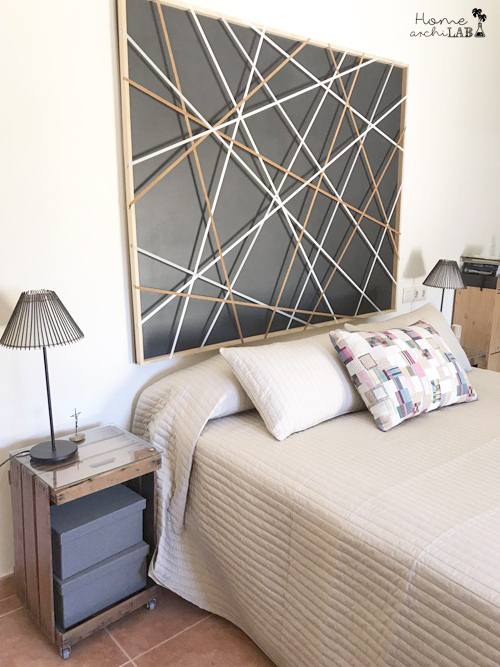
Photo ©Home archiLAB
To decorate the night table, a very simple and inexpensive idea is to place a few olive branches inside an elegant glass bottle. In this case, I used a water bottle that I had been given at a restaurant. It is one of those beautiful glass bottles that just by removing the label it turns into a beautiful vase. I put a few olive branches inside, as my in-laws’ garden has an olive tree and the gardener was conveniently pruning that day. It’s amazing how much these branches stand-out.
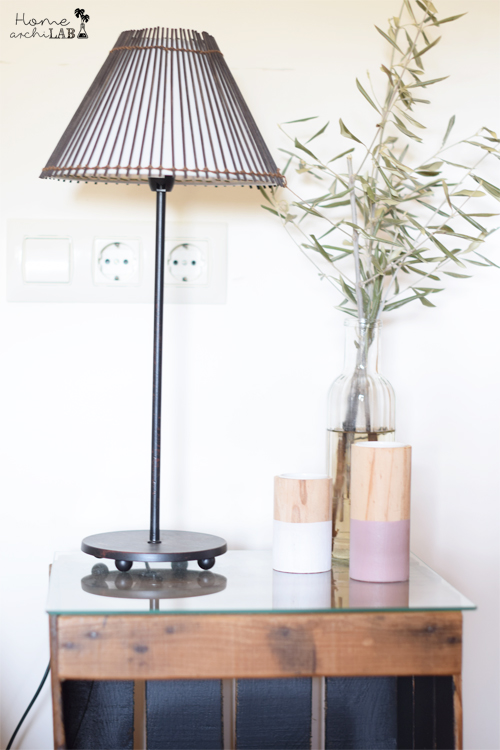
Photo ©Home archiLAB
If you want to see more ideas of this type, don’t miss out my next post where I will discuss natural and inexpensive decoration with branches.
I hope you liked this and if you are encouraged to do it, you’ll send me some pictures of the end-result!


